Sunday, July 27, 2008

Getting closer to the finish line

We are getting much, much closer to the end of this basement project. The flooring will be the next big purchase and the final big task to call it complete. This is an example photo of our favorite floor so far - a Shaw laminate in a Victorian Pine style:
We love the color of this floor and it seems to work very well with our color scheme, which is very similar to the sample photo from the manufacturer. We originally were looking at bamboo flooring but after a week or two of looking at other floors, the bamboo didn't look so good anymore. We've changed our minds a few times and there's always a chance it will change again once we actually go to a store and look at the flooring firsthand. We'll be heading over to the new iFloor store after it opens up this week in Buford.
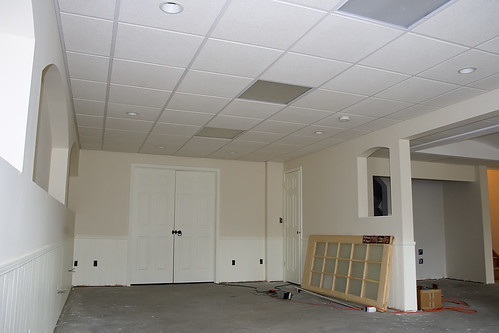
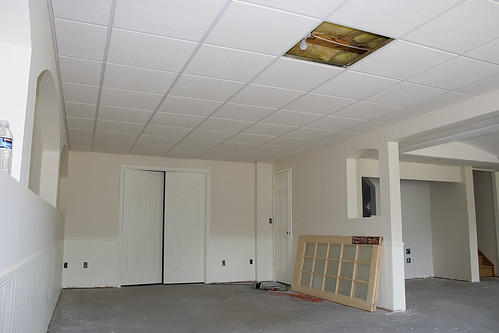
There's not a lot to do right now while we are waiting on the floor. This weekend I put up the sliding rail that will hold a pair of French doors that divide the home theater from the sewing/crafts room. These doors are in a bypass configuration so you can slide one over and walk through. This is to keep pets out of the sewing room. These doors are pretty heavy but they slide smoothly on the rail from Johnson Hardware. Here's a photo of the doors hung up to check the fit:
Basement
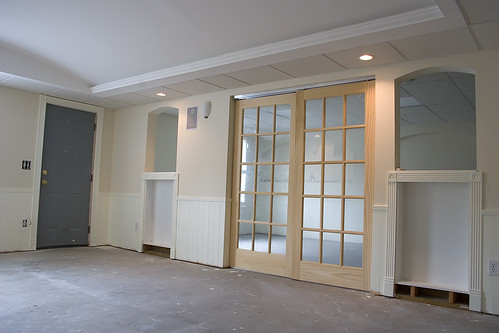
There will be a guide rail for the bottom of the doors attached to the concrete floor. We found out that the doors will need to be trimmed on the bottom to clear the guide rail. Then they will be painted to match the trim. The back door will also be painted the same color, which still hasn't been done as you can see.
Basement
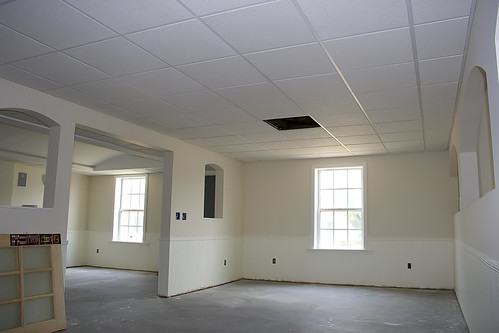
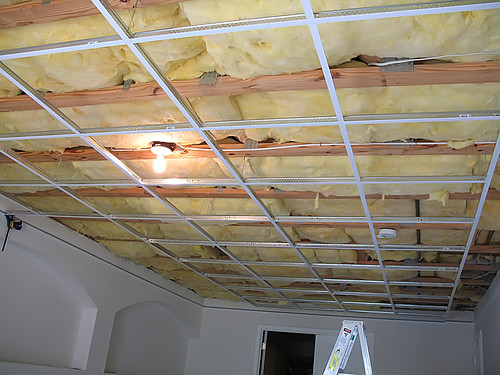
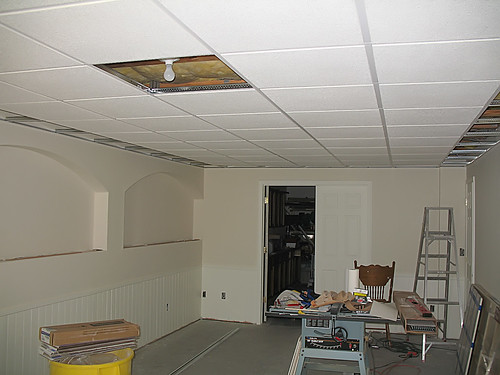
The can lights in the above photo were connected to an existing lighting circuit that was there when the house was built (and the only lighting circuit down there). The other circuits have not been connected to the panel yet. That's a task for another weekend. I'm taking it easy today!

Sunday, July 20, 2008

Sofa Shopping

We've been doing a lot of research lately regarding sofas and went out today to see our top picks firsthand. Our original budget for a small (120 inches long or less) sectional was $1500 which pretty much limited us to Ikea. After looking around at other brands the Ikea sofas didn't seem so appealing anymore and we raised our budget. We then looked into West Elm, La-Z-Boy, Pottery Barn, and Crate & Barrel. While looking into some of these we heard about Lee Industries' sofas, which can be found at Crate & Barrel. Lee was one of our top picks, along with the Potter Barn PB Square series, and the Crate & Barrel Troy series.
We first headed over to Crate & Barrel in Alpharetta to check out the Troy and also see if they had any Lee sofas in the showroom. We immediately liked the Troy when we saw it, and it was very, very comfortable. I'm not a big fan of sofas that you sink into and the Troy was somewhat firm and perfectly supportive - just what I was looking for. We tried several others in the store but none felt as comfortable as the Troy. With the help of a sales associate there we found a Lee sofa but it was not comfortable at all. The associate was really helpful showing us all the available fabrics and also let us know of a sale coming up at the end of August for all custom orders. The lead time is up to 12 weeks but we can live with that to get just the sofa we want.
Here is the display model Troy sofa which shows the exact configuration we want:
Sofa Shopping


It has a left-hand chaise and a right-hand loveseat combined. We'll also get a matching ottoman. We decided on an off-white natural fabric with chocolate colored wood legs (the photo is a little too red):
Sofa Shopping


We headed over to a few more places even though we were nearly dead-set on getting the Troy sofa. We visited Macy's Furniture Gallery, Thomasville, La-Z-Boy, Havertys, and Pottery Barn. Nothing compared to the Troy. Most of the places were too old-fashioned or too formal for our style. We'll wait until the end of August for the Crate & Barrel 25% off sale, then we'll try to patiently wait up to 12 weeks more for our sofa to arrive.
Next weekend it's time to pick out the wood floors!

Sunday, July 13, 2008

Another basement update

This weekend I wired & installed the can lights and fluorescent fixtures in the room that will become my wife's sewing/crafts room. A total of eight can lights and three fluorescent fixtures were installed. Next weekend I'll finish up the lighting on the other side in the home theater. Then we'll be ready for flooring.

First photo:
Basement


Second photo:
Basement


Last one:
Basement


I forgot to mention that we also installed plantation shutters on the two windows. We really like how these add to the feel of the rooms.

Friday, July 4, 2008

Happy July 4th!

While the weather is hot and dry outside and my brown yard continues to get browner, we worked in the cool basement and finished the ceiling. It's a good feeling to have that done. Today we cut and installed all the border panels around the perimeter of the room. While I cut each piece, my wife installed them in the grid. The pieces that border the wall can be rather time consuming to cut due to the recessed edge on these type panels. The recessed edge gives more of a three-dimensional look to the panels and is much more stylish than the typical office type panels that sit flush with the grid. Each border panel must be cut by hand and it takes 3 cuts to make the recessed edge (6 cuts on each corner panel). Needless to say, after hand cutting 36 border panels in 3 hours my hand is hurting.
This first photo looks down the room towards the doors that lead into my workshop. I left a panel out where the old light fixture is mounted. I've ordered three 2' x 2' fluorescent fixtures that will be mounted down the center line of the ceiling. Then I will install about 8 can lights around the perimeter.
Suspended Ceiling


Here's a view looking back the other way down the room.
Suspended Ceiling


And another one..
Suspended Ceiling


Last one...
Suspended Ceiling

Thursday, July 3, 2008

More basement work

Today I took a day off work to have some extra time to finish up the suspended ceiling over the long holiday weekend. Turns out that I really didn't need all that time. In less than 4 hours this morning I had all the grid installed and all the panels placed except for the perimeter panels that need trimmed. The Armstrong ceiling system is very easy to install as long as you take careful measurements and plan everything ahead. Once you have the first few pieces of grid squared up, the remaining pieces literally snap together in minutes. It also helped a lot that my wife was handing me the grid pieces as I installed them.
Here's a photo of the grid in progress, nearly complete at this point:
Suspended Ceiling 1


Here I am snugging up the wires that support the main beams. This room has three main beams running the length of the room (25-1/2 feet) and they serve as the backbone of the entire ceiling.
Suspended Ceiling 2


This photo is how it looks like now. I could have spent the rest of the day cutting the perimeter panels but yard work needed to get done this afternoon.
Suspended Ceiling 3


Tomorrow I will finish up the ceiling and maybe we can actually sit back and enjoy the rest of the weekend.