A while back in this thread I talked about the work that Tom at Astro Motion Technologies did on my EQ6 mount. Since then many people have asked me when this modification would be available to the public. Today I just happened to check Andy's Shot Glass to see if there was anything new and I was happy to see an article about AMT and an ordering page. Looks like they finally got it going and I am glad to have been a part of the beta testing of this process. I can attest to the improvement in my mount's performance. You can see my test data in the FAQ section of the article. If you are interested in getting this work done on your mount, head over to the following link:
http://www.andysshotglass.com/astromo_mod_store.html
Now if I can ever get my basement finished I'll get back to astrophotography.
Showing posts with label Astronomy. Show all posts
Showing posts with label Astronomy. Show all posts
Wednesday, August 13, 2008


Monday, December 3, 2007
"Starfinder" from DK Publishing
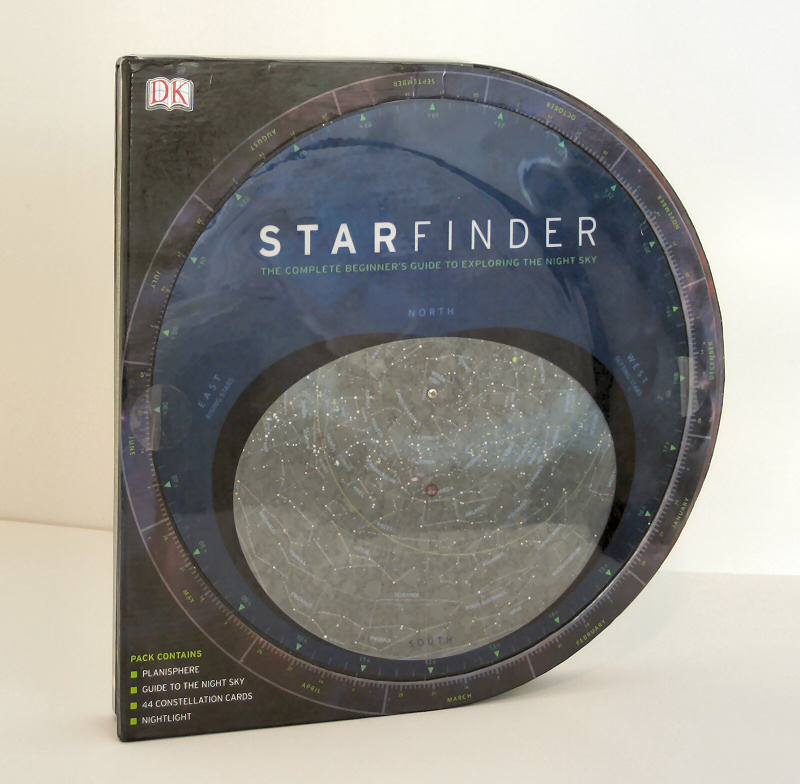 I was recently offered a copy of the book "Starfinder" from DK Publishing to review. I have quite a few Astronomy related books sitting around already, many of which are collecting a bit of dust right now. But it's always interesting to read something new, so I quickly accepted the generous offer. The book arrived and I was immediately surprised by the size. The "book" is actually a multi-functional case for it's contents. It is different & interesting with it's rounded shape, interior compartments, and a planisphere built right into the cover. While the size makes it stand out among other books, it is also slightly inconvenient since I don't have any shelves to accommodate it's 12+" by 12+" dimensions. I prefer the typical 8-1/2x11 size book, although making "Starfinder" any smaller would probably make the planisphere very difficult to read.
 The cover opens up to reveal some how-to information for using the planisphere, as well as a guide to using the included constellation charts, found in little compartments on the interior of the book. Also inside the book is a small red LED flashlight. I must admit I laughed when first seeing this diminutive device, but it actually performs pretty well under total darkness. Most of us already involved in this hobby will have a good red LED flashlight, but for beginners this one will do just fine.
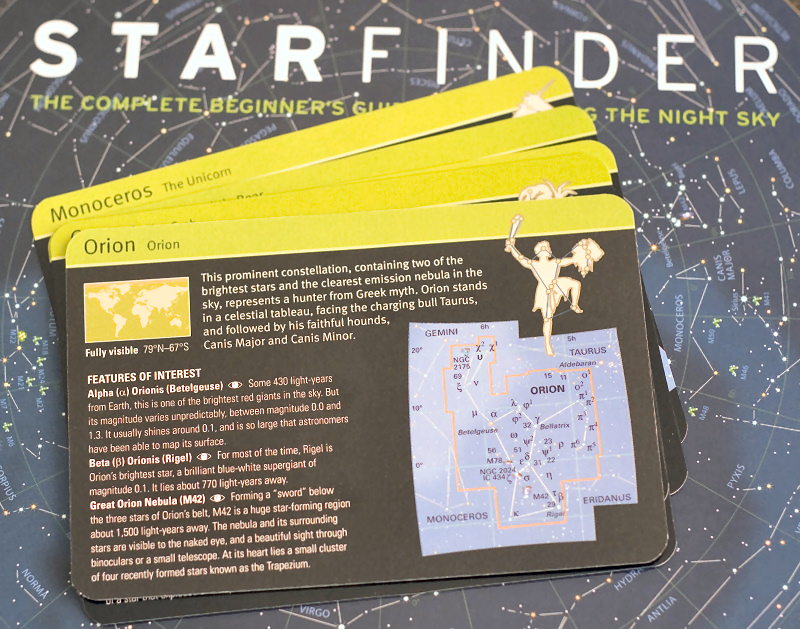 There are 44 double-sided constellation charts included made of sturdy high-quality card stock measuring 5-1/2"x3-3/4" each. They are divided up into 22 northern hemisphere cards and 22 southern hemisphere cards. Each card has a chart of the constellation showing the brighter-magnitude stars and Messier/NGC objects. There's a brief description of interesting objects which indicate if the object is visible by naked eye, binoculars, or telescope.
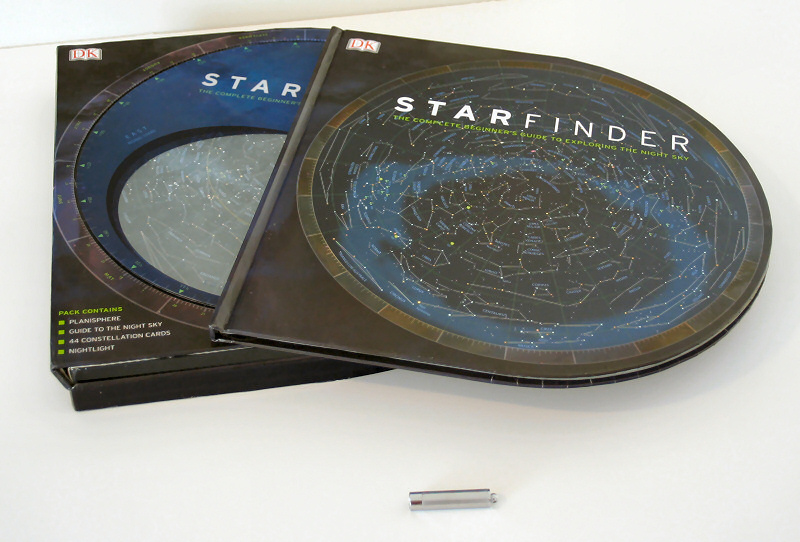
Tucked inside the back is a similarly-shaped reference book which is 72 pages long. This book is divided into three sections: Finding Your Way, The Solar System, and a Monthly Sky Guide. Finding your way has a lot of good information for the beginner explaining the vast distances involved in the universe, how our view of the sky changes with the seasons, basics of constellations, the mechanics of the solar system, objects of our Milky Way and beyond, basic info for getting started viewing, and an overview of "star-hopping." The Solar System section takes you on a tour from the Sun all the way out to Neptune, and even beyond that with comets, asteroids, and dwarf planets.
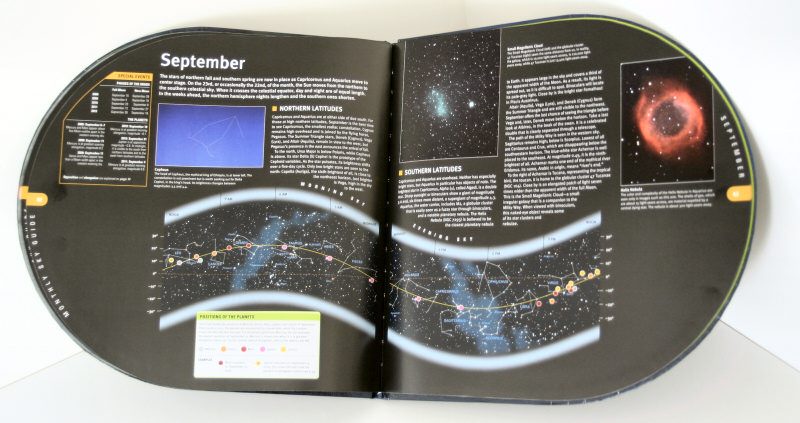
The final section is a Monthly Sky Guide which takes the reader month-by-month through the sky, describing interesting events & planetary positions over the next five years. A handy chart shows where the planets can be found among the constellations, and if they are in retrograde motion. The Monthly Sky Guide section includes information for both northern and southern hemisphere observers.
Besides the physical size issue I mentioned, my only other minor complaint would be the planisphere. While it is a very nice planisphere, it is built into the front cover and cannot be removed. I would love to be able to take just the planisphere outside without having to hold up the entire bulk of this book. Overall I found the content to be appropriate for the beginner while still being a handy guide for the seasoned observer. This book will give anyone a good start into astronomy without a lot of technical talk. The price is not bad either, just $18.40 from Amazon.com.
Thursday, October 25, 2007
M31 - the Andromeda Galaxy (in progress)
Now that the full moon is blazing brightly in the night sky (made even brighter by being in perigee) I am taking some time to go back over the images of M31 collected two weeks ago under the dark skies of the new moon. I spent two nights in a row collecting 5 minute, 3 minute, and one minute exposures at ISO 800. In hindsight I should have just taken a lot of 5 minute exposures and a few short ones, but I was curious if I could get close to the same result with a lot of 3-minute exposures. There was no contest - the 5-minute subs resulted in a much better image than lots more shorter subs. Eventually I will work up a comparison. I got to a stopping point last week with the stack of 5-minute subs, and decided to take a break for a while and come back later with a fresh start. Here's the result of that previous work:

It's a pretty good image, I think, but maybe it could be better? Maybe I've been looking at it too much and noticing all the flaws. I'll keep reading "Photoshop Astronomy" and going through the tutorials provided with ImagesPlus to get some ideas. I still have lots to learn about image processing. The above image was mostly the result of a few Levels and Curves adjustments in Photoshop, along with a high-pass filter mask.
Looking back at where I was a year ago while just starting out, I believe I have improved quite a bit. Here is last years M31 - my first:


It's a pretty good image, I think, but maybe it could be better? Maybe I've been looking at it too much and noticing all the flaws. I'll keep reading "Photoshop Astronomy" and going through the tutorials provided with ImagesPlus to get some ideas. I still have lots to learn about image processing. The above image was mostly the result of a few Levels and Curves adjustments in Photoshop, along with a high-pass filter mask.
Looking back at where I was a year ago while just starting out, I believe I have improved quite a bit. Here is last years M31 - my first:

Wednesday, October 17, 2007
The crescent moon passes near Jupiter
Last Sunday evening I just happened to glance outside and see a thin crescent moon low on the horizon with Jupiter beginning to shine brightly above it. The color of the sky was interesting and I quickly grabbed the Rebel XT and the tripod for a few quick images.

The next evening the moon was even closer to Jupiter. Clouds were rolling in and I managed to find a break to capture this view. The bright star Arcturus is visible to the right of the moon.


The next evening the moon was even closer to Jupiter. Clouds were rolling in and I managed to find a break to capture this view. The bright star Arcturus is visible to the right of the moon.

Wednesday, October 10, 2007
The Moon, Saturn, & Venus Get Together

Finally fall is here and the muggy skies of summer are clearing out to reveal deep black skies with stars seemingly shining brighter than ever. The clear, drier air really makes the stars pop - a welcome scene after months of heat, haze, & humidity. On the morning of Sunday 10/07, the Moon teamed up with Saturn and Venus to make a nice grouping in the eastern pre-dawn sky. I was excited the night before with the thought of viewing this event and capturing it with my camera. I was a little less excited when the alarm went off at 5:30AM, but I crawled out of bed and got set up outside, still partially asleep. This was a good opportunity to try out my new Sigma 55-200mm zoom lens. At about 147mm everything framed up nicely and I snapped several images at various exposure times. I combined four images ranging from 0.4s to 2.5s to make the above image. After just watching this beautiful alignment for a little while, and catching a few bright meteors whizzing by, I headed back to bed for more sleep. I'm so happy "imaging season" has returned to Georgia.
Sunday, August 12, 2007
Another night in about a minute
Saturday night I set up the camera again, this time pointing more towards the northern part of the sky. Exposures were set to 16 seconds with a bit higher gain than before. You'll notice the top of the chimney flashing in the lower left corner. That's my neighbor's motion-detecting light coming on every time a car passes by on the road in front. One of the lights on his front corner points straight back into my backyard - very annoying!
Anyway, I think I caught one meteor - pretty disappointing.
Anyway, I think I caught one meteor - pretty disappointing.
Saturday, August 11, 2007
One night in about a minute
I've been thinking about building an all-sky camera for a while now. It's not something I really need but it seems like a fun project. I recently received a small optical dome from Surplus Shed. I don't know what camera I will end up using for the final version. Last night I set my DMK21AF04.AS camera up on a tripod with a Fujinon 2.8mm lens attached. I taped a Baader UV/IR filter on front of the lens and pointed the camera straight up. The exposures were set to about 20 seconds each with the gain set fairly low to reduce noise. I let it run from 10PM to 6AM and used the Y800 mode for recording the video in IC Capture. The video starts with Vega shining brightly just above left of center, and ends with the Pegasus moving off to the right as the Pleiades and Mars approach on the left before dawn. I was hoping to catch a few Perseids but I think I only caught air traffic going by. Here's the result, converted to 15 frames per second:
I will eventually get a wider angle lens since the 2.8mm Fujinon only has about a 90-degree field of view. There's a more expensive varifocal lens that covers nearly 180 degrees. A little more saving will be required before I get that lens. But then my birthday is coming soon!
I will eventually get a wider angle lens since the 2.8mm Fujinon only has about a 90-degree field of view. There's a more expensive varifocal lens that covers nearly 180 degrees. A little more saving will be required before I get that lens. But then my birthday is coming soon!
Monday, August 6, 2007
My first Jupiter in LRGB with the DMK21AF04.AS
My new Astronomik LRGB filters came in last Friday and I was just itchin' to try them out. Saturday night seemed like my best opportunity in a long time - the skies were about as clear as it's gonna get in summer. In other words, hazy and humid. The seeing was just OK but that wasn't going to stop me.
I had a couple of other new "toys" - the Atik manual filter wheel and a Televue 2X barlow. I also picked up a C-mount to T-thread adapter to mount my DMK21AF04.AS camera to the male T-threads of the filter wheel. The other side of the filter wheel uses a T-thread to 1.25" nosepiece adapter.
I started out by slewing to a medium brightness star and checking focus using Metaguide. I've used Metaguide a lot for autoguiding, but one feature I really like is the FWHM measurement. That gives me a quick way of dialing in the right focus without messing around with a mask or any other focusing aids.
Once centered on Jupiter I fired up IC Capture and adjusted for the right exposure. I should have taken some screen shots here, but what I did was open up the histogram and adjust the exposure & gain settings to get the maximum spread of the histogram with each filter. The luminance filter required a shorter exposure and less gain while the color filters needed longer exposures. The blue filter took the longest exposure and as expected, due to atmospheric turbulence, it produced the worst quality image. The atmosphere affect the longer wavelengths more than the red (shorter) wavelengths. I only took no more than one minute of each color and luminance at 15 fps. Jupiter rotates very fast, so you must move quick. I was pleasantly surprised to find Io transiting across Jupiter's disk when I got started. The moon Io is similar in size to our own moon. I took a couple of quick LRGB sequences and worked on the results in Registax. The resulting images were saved in TIFF format, then some minor adjustments were made in Photoshop. I then used ImagesPlus to align the images and combine as a LRGB image. Here's the result which also shows the separate channels:

I am very happy with the result, especially since I really don't know what I am doing with Registax, and have only been at this for less than one year. I still have a lot to learn but I am enjoying it and taking things slowly.
After taking some AVI's with the DMK camera, I decided to pop in the SPC900NC webcam before Io was gone to make a quick comparison. I took a few one-minute videos and tried my best to squeeze out some detail in Registax. This is the best I could get, and it's definitely not even close to the quality of the DMK:

Now I need to find a good home for the SPC900NC. It doesn't look like it will see much use anymore.
I had a couple of other new "toys" - the Atik manual filter wheel and a Televue 2X barlow. I also picked up a C-mount to T-thread adapter to mount my DMK21AF04.AS camera to the male T-threads of the filter wheel. The other side of the filter wheel uses a T-thread to 1.25" nosepiece adapter.
I started out by slewing to a medium brightness star and checking focus using Metaguide. I've used Metaguide a lot for autoguiding, but one feature I really like is the FWHM measurement. That gives me a quick way of dialing in the right focus without messing around with a mask or any other focusing aids.
Once centered on Jupiter I fired up IC Capture and adjusted for the right exposure. I should have taken some screen shots here, but what I did was open up the histogram and adjust the exposure & gain settings to get the maximum spread of the histogram with each filter. The luminance filter required a shorter exposure and less gain while the color filters needed longer exposures. The blue filter took the longest exposure and as expected, due to atmospheric turbulence, it produced the worst quality image. The atmosphere affect the longer wavelengths more than the red (shorter) wavelengths. I only took no more than one minute of each color and luminance at 15 fps. Jupiter rotates very fast, so you must move quick. I was pleasantly surprised to find Io transiting across Jupiter's disk when I got started. The moon Io is similar in size to our own moon. I took a couple of quick LRGB sequences and worked on the results in Registax. The resulting images were saved in TIFF format, then some minor adjustments were made in Photoshop. I then used ImagesPlus to align the images and combine as a LRGB image. Here's the result which also shows the separate channels:
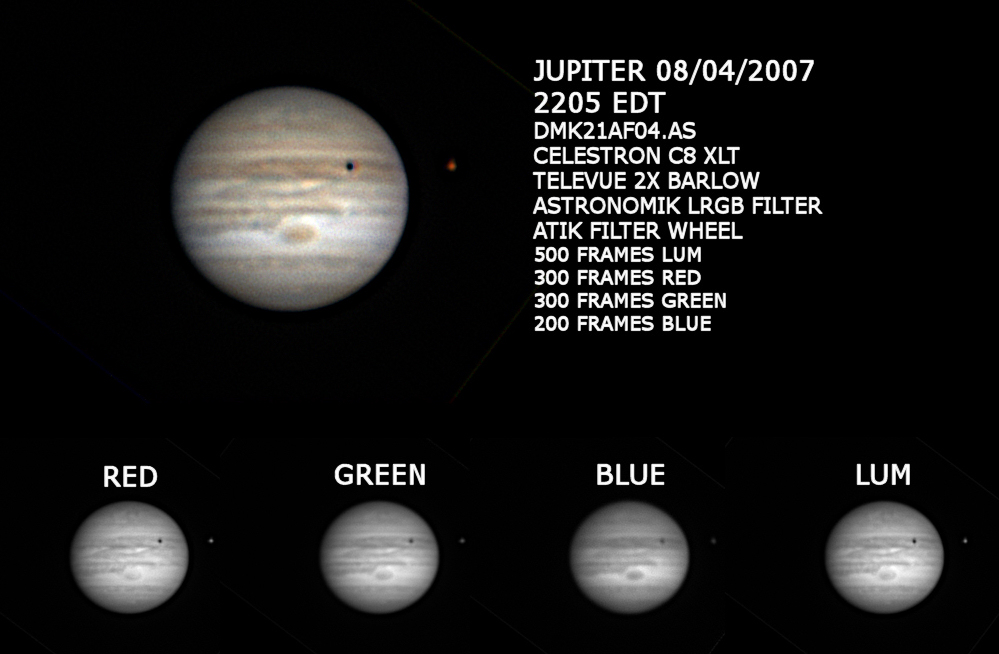
I am very happy with the result, especially since I really don't know what I am doing with Registax, and have only been at this for less than one year. I still have a lot to learn but I am enjoying it and taking things slowly.
After taking some AVI's with the DMK camera, I decided to pop in the SPC900NC webcam before Io was gone to make a quick comparison. I took a few one-minute videos and tried my best to squeeze out some detail in Registax. This is the best I could get, and it's definitely not even close to the quality of the DMK:
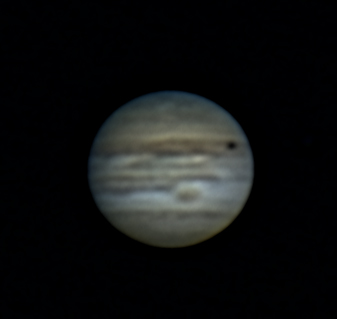
Now I need to find a good home for the SPC900NC. It doesn't look like it will see much use anymore.
Sunday, August 5, 2007
First light with the DSI Pro
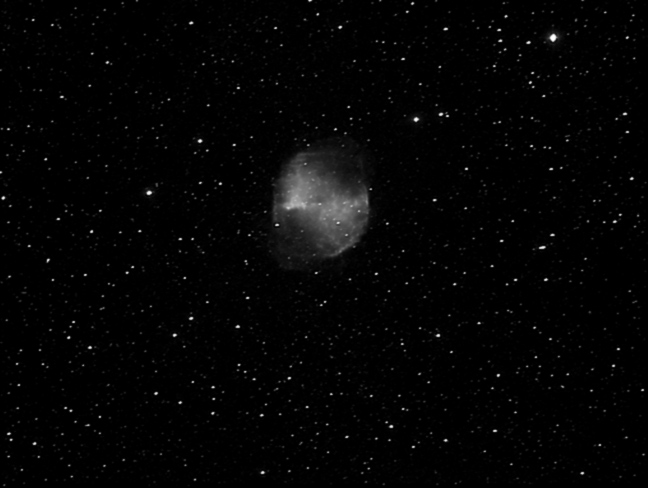
Saturday night I headed out for a quick test of my new Meade DSI Pro. The weather finally cooperated on a weekend - first time in 3 months. Even after 10PM it was still pretty hot outside, and I had to wear long pants and a long-sleeved flannel shirt to keep the mosquito bites to a minimum. I was sweating, uncomfortable, and busy swatting the skeeters away from my face & ears, but I managed to capture a quick set of images. After taking a few test shots to tweak the focus, I set the long exposure mode to 60 seconds and let the software take it from there. Looking at the individual frames was not that impressive, but there was something there. Here's a single 60-second image of M27 - the Dumbbell Nebula:

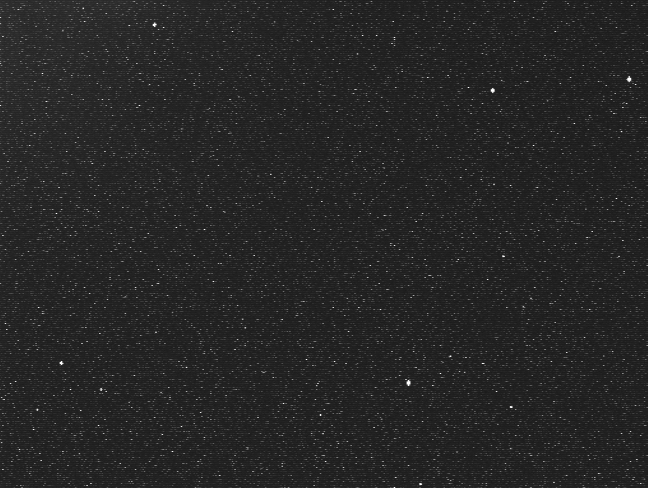
I chose the option to save all raw images to FITS format. Since the DSI Pro has non-square pixels, the raw format file actually comes out "squished" horizontally to 508 pixels wide instead of the full format of 648 pixels wide. When using Envisage to do all the combining it automatically corrects the image scale. I am comfortable with ImagesPlus, so I just transformed the horizontal dimension in IP after alignment and stacking. I also took a few dark frames - here's one 60-second dark frame at around 80 degrees:

Having only 20 exposures I wasn't expecting much, especially after seeing the noisy single frames. But I was pleasantly surprised after a median combine and a quick DDP adjustment in ImagesPlus. The outer faint details in M27 were clearly evident in the resulting image. Next time I will try with my new LRGB filters. Overall I am very impressed with the DSI Pro and looking forward to much more imaging, weather permitting. Here's my result of 20 exposures at 60 seconds each:

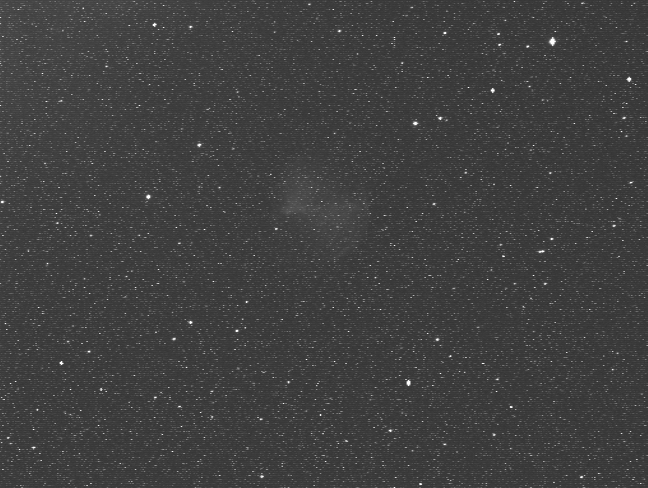
I chose the option to save all raw images to FITS format. Since the DSI Pro has non-square pixels, the raw format file actually comes out "squished" horizontally to 508 pixels wide instead of the full format of 648 pixels wide. When using Envisage to do all the combining it automatically corrects the image scale. I am comfortable with ImagesPlus, so I just transformed the horizontal dimension in IP after alignment and stacking. I also took a few dark frames - here's one 60-second dark frame at around 80 degrees:
Having only 20 exposures I wasn't expecting much, especially after seeing the noisy single frames. But I was pleasantly surprised after a median combine and a quick DDP adjustment in ImagesPlus. The outer faint details in M27 were clearly evident in the resulting image. Next time I will try with my new LRGB filters. Overall I am very impressed with the DSI Pro and looking forward to much more imaging, weather permitting. Here's my result of 20 exposures at 60 seconds each:
Tuesday, July 31, 2007
The DSI Pro arrives!
Today my new DSI Pro arrived from the fine folks at Astronomics. I bet they were pretty busy shipping out loads of these cameras. There's going to be hundreds and hundreds of happy new DSI & DSI Pro owners all across the country. I opted for the DSI Pro to get more sensitivity. I had previously ordered an Atik filter wheel and a set of Astronomik LRGB filters for planetary imaging, so getting a monochrome CCD camera was a "no brainer."
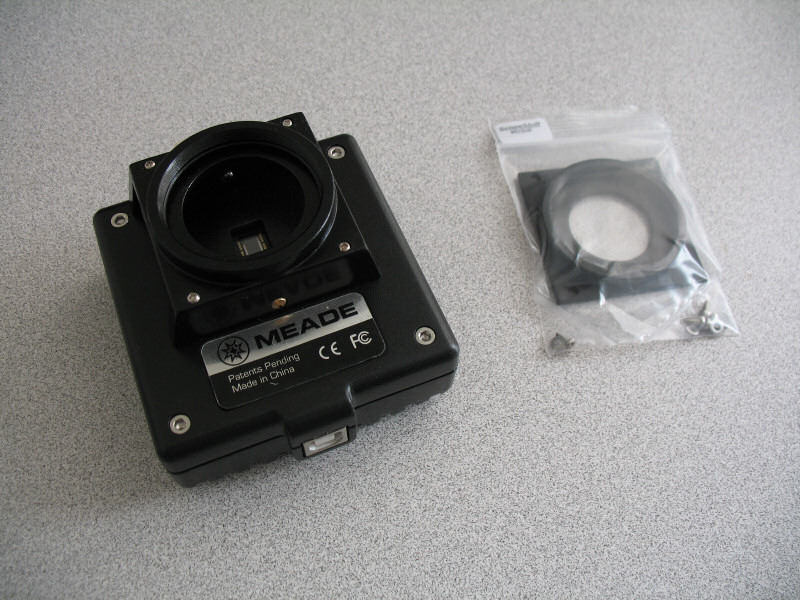
The first order of business was to install the Meade Autostar Suite software. Installation went without a hitch on my Dell laptop running Windows XP. As many people have recommended, I rebooted after the installation and then installed the Autostar Suite Update 4 from the Meade website. Once the software was all squared away, it was time to get my hands on the camera. I must say I am pretty impressed with the overall build quality of the camera. It feels solid and heavy in my hands, not unlike the feel of my DMK21AF04.AS firewire camera. For some reason, the heavier something is, the more robust and well-constructed it seems. It's a world of difference from the cheap feel of my Philips SPC900NC camera with it's plastic housing and next-to-nothing weight. Getting back to the DSI Pro, I had already ordered a low-profile adapter from Scopestuff. This replaces the filter holder nosepiece, which is of no use to me. Here's an image of the DSI Pro next to the Scopestuff adapter:

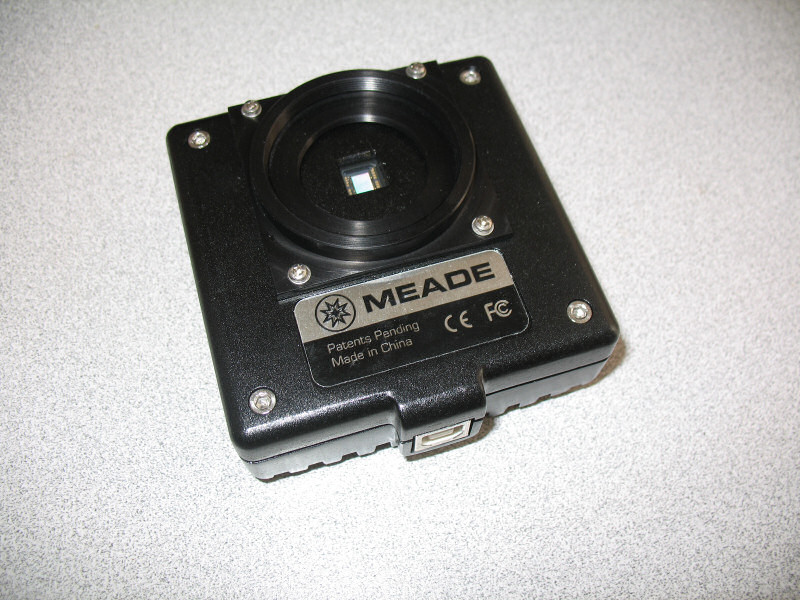
The nosepiece is easily removed by loosening the four small screws at the four corners. The Scopestuff adapter comes with new screws that are much shorter. The adapter simply mounts to the same four holes and that's it. Now you have a female T-thread connection for whatever you need:

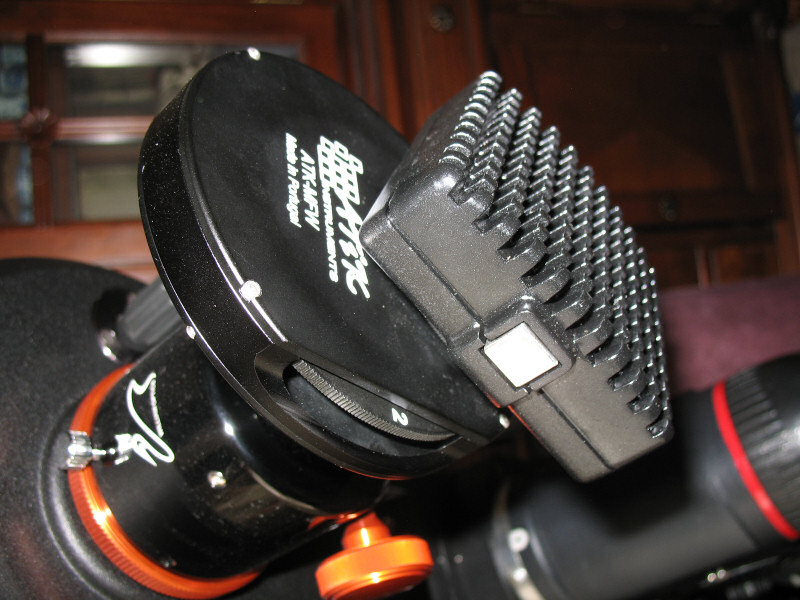
The DSI Pro now fits nice and snug to my Atik filter wheel:

Here's another view:

The new setup is almost ready to go. I'm just waiting on the Astronomik LRGB filters to arrive. They should be here on Friday, and if the weather cooperates I just might get some imaging in this weekend. I'm not too optimistic after two months of hazy skies, but I will keep my fingers crossed.
The first order of business was to install the Meade Autostar Suite software. Installation went without a hitch on my Dell laptop running Windows XP. As many people have recommended, I rebooted after the installation and then installed the Autostar Suite Update 4 from the Meade website. Once the software was all squared away, it was time to get my hands on the camera. I must say I am pretty impressed with the overall build quality of the camera. It feels solid and heavy in my hands, not unlike the feel of my DMK21AF04.AS firewire camera. For some reason, the heavier something is, the more robust and well-constructed it seems. It's a world of difference from the cheap feel of my Philips SPC900NC camera with it's plastic housing and next-to-nothing weight. Getting back to the DSI Pro, I had already ordered a low-profile adapter from Scopestuff. This replaces the filter holder nosepiece, which is of no use to me. Here's an image of the DSI Pro next to the Scopestuff adapter:
The nosepiece is easily removed by loosening the four small screws at the four corners. The Scopestuff adapter comes with new screws that are much shorter. The adapter simply mounts to the same four holes and that's it. Now you have a female T-thread connection for whatever you need:
The DSI Pro now fits nice and snug to my Atik filter wheel:
Here's another view:

The new setup is almost ready to go. I'm just waiting on the Astronomik LRGB filters to arrive. They should be here on Friday, and if the weather cooperates I just might get some imaging in this weekend. I'm not too optimistic after two months of hazy skies, but I will keep my fingers crossed.
Wednesday, June 6, 2007
More videos
Now let's take a look at a couple of Saturn videos. The first was taken with the DMK21AF04 in my Celestron C8 using a 2X barlow.
And here's a video taken right after the above but using my Philips SPC900NC color webcam. I'm not sure what's causing the poor signal quality.
And here's a video taken right after the above but using my Philips SPC900NC color webcam. I'm not sure what's causing the poor signal quality.
Monday, June 4, 2007
A couple of videos
I thought it would be interesting for anyone who hasn't yet tried lunar/planetary imaging to see what the raw video looks like coming out of a DMK21AF04 camera. You can get an idea of how much things move and shimmer around. The first video is the area of the moon around Tycho and Clavius. This video was taken in my Celestron C8 at the native focal length of 2032mm @ f/10. Things look pretty steady at this focal length:
Now let's crank up the magnification by adding a 2X barlow with a 2" extension between the barlow and the camera to increase the overall magnification to about 3X. At around 6000mm focal length, things start moving around much more and the tiniest little bump of the tripod or scope shakes the image pretty badly for 2-3 seconds. Also, the image becomes darker, requiring longer exposures and some extra gain:
Now let's crank up the magnification by adding a 2X barlow with a 2" extension between the barlow and the camera to increase the overall magnification to about 3X. At around 6000mm focal length, things start moving around much more and the tiniest little bump of the tripod or scope shakes the image pretty badly for 2-3 seconds. Also, the image becomes darker, requiring longer exposures and some extra gain:
Saturday, June 2, 2007
Another Saturn
This is from last week and it's a slightly better image of Saturn than my first attempt. I was using the DMK21AF04 along with my 2X Siebert barlow in the C8. Saturn was getting a little low in the sky at the time, but the great transparency helped me get a little more detail:

Then I swapped out the DMK for my Philips SPC900NC webcam and tried to get a color image. The images I get from the SPC900NC always seem to have some banding that I haven't quite figured out yet. I removed most of it in Photoshop using Noel Carboni's Astronomy Tools plugin "Vertical Banding Noise Reduction."

Then I tried to manually add the DMK image above as a luminance layer to the color image. This was difficult since the two images did not line up and I could not get ImagesPlus to align them using the auto planet align function. A slight improvement, maybe??

That's probably it for Saturn attempts this year. Next on the list will be Jupiter, then maybe Mars.

Then I swapped out the DMK for my Philips SPC900NC webcam and tried to get a color image. The images I get from the SPC900NC always seem to have some banding that I haven't quite figured out yet. I removed most of it in Photoshop using Noel Carboni's Astronomy Tools plugin "Vertical Banding Noise Reduction."

Then I tried to manually add the DMK image above as a luminance layer to the color image. This was difficult since the two images did not line up and I could not get ImagesPlus to align them using the auto planet align function. A slight improvement, maybe??

That's probably it for Saturn attempts this year. Next on the list will be Jupiter, then maybe Mars.
Sunday, May 27, 2007
More lunar imaging with the DMK camera
Last Friday night, under good transparent skies, I tried my hand once again at lunar imaging with the DMK21AF04. This little camera continues to impress me. It makes it so easy to get great results. Of course a properly collimated telescope and good focus helps too. I think I got the collimation spot-on but focus is always tricky.
I started the night with the slightly-more-than-half-full moon directly overhead, which is a prime spot for getting good images. The Tycho & Clavius area was my first target. Below is my first image, recorded at the Celestron C8's native focal length of 2032mm at f/10:

To get closer in, you need to increase focal length. A barlow is the most common method of doing this and they come in various power ratings and quality levels. My barlow is a 2" Siebert telecentric model with a 2X power rating. This doubles my focal length and allows some really close-up viewing of the moon. The power can be further increased by adding an extension between the back of the barlow and the camera. Here's a close up of Clavius using this method with a 2" extension:

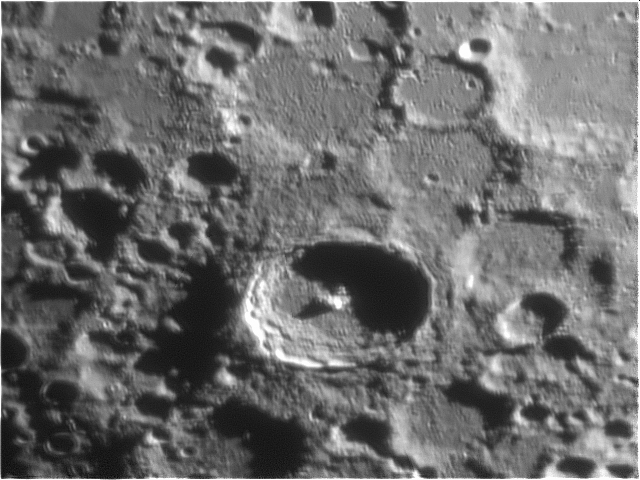
As you increase focal length, the image becomes darker and movement from atmospheric distortion gets magnified even more. It gets really difficult to capture a good image at this focal length. Below is another extreme close up, this is Tycho:

Without the extension the same area looks like this:

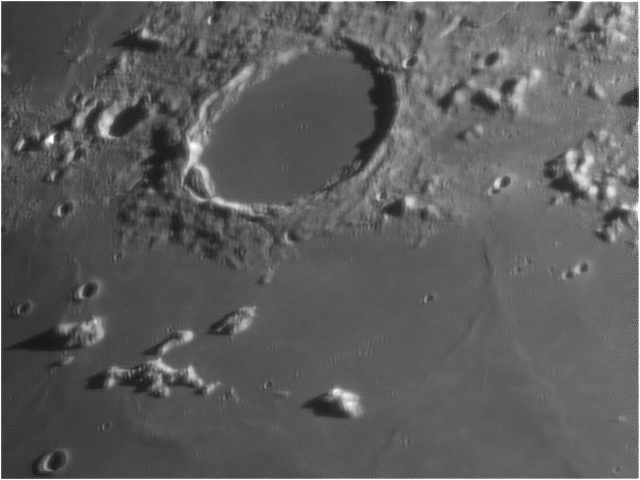
The same effect can be seen here on the crater Plato. Here's an image with the 2X barlow and 2" extension:

Removing the extension increases the field of view as seen below:

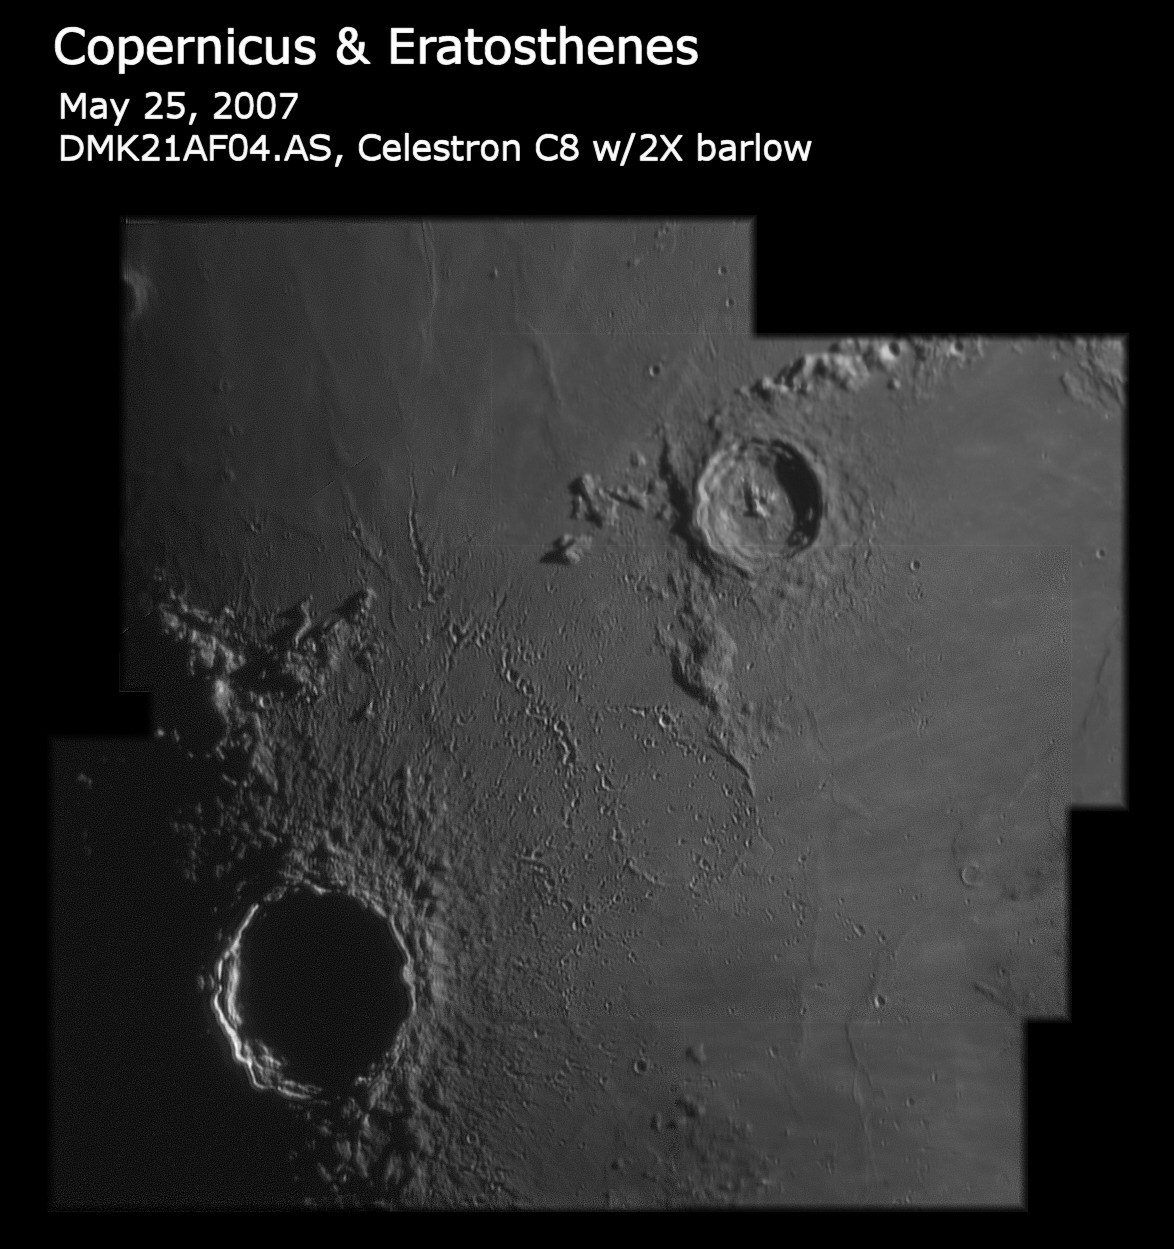
Next, I recorded several AVI's around the crater Copernicus and created a mosaic in Photoshop:

Here's some other highlights from the evening:
Craters Walter & Lexell:

Craters Stöfler & Faraday:

Craters Saussure, Orontius, Huggins, Nasiredden, & Miller:

Rupus Recta:

Craters Purbach & Thebit:

Craters Ptolemaeus & Herschel:

Craters Pitatus, Guaricus, Wurzelbauer, & Hesiodus:

Craters Fra Mauro, Bonpland, & Parry:

Craters Arzachel, Alpetragius, & Thebit:

I started the night with the slightly-more-than-half-full moon directly overhead, which is a prime spot for getting good images. The Tycho & Clavius area was my first target. Below is my first image, recorded at the Celestron C8's native focal length of 2032mm at f/10:
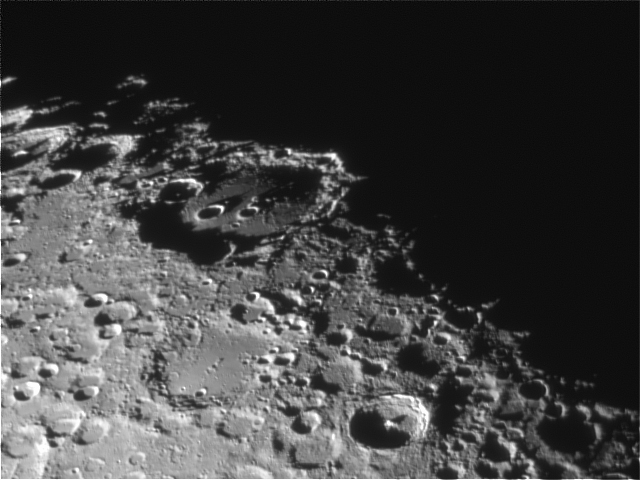
To get closer in, you need to increase focal length. A barlow is the most common method of doing this and they come in various power ratings and quality levels. My barlow is a 2" Siebert telecentric model with a 2X power rating. This doubles my focal length and allows some really close-up viewing of the moon. The power can be further increased by adding an extension between the back of the barlow and the camera. Here's a close up of Clavius using this method with a 2" extension:

As you increase focal length, the image becomes darker and movement from atmospheric distortion gets magnified even more. It gets really difficult to capture a good image at this focal length. Below is another extreme close up, this is Tycho:
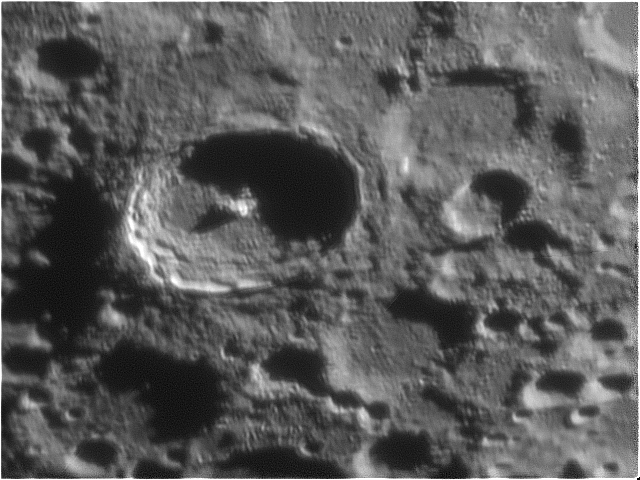
Without the extension the same area looks like this:
The same effect can be seen here on the crater Plato. Here's an image with the 2X barlow and 2" extension:
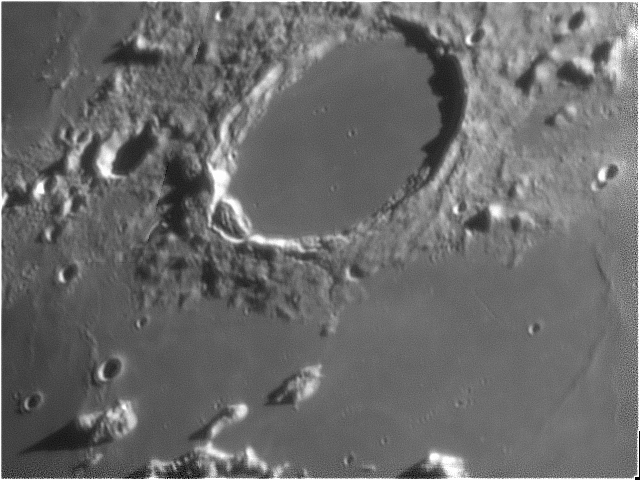
Removing the extension increases the field of view as seen below:
Next, I recorded several AVI's around the crater Copernicus and created a mosaic in Photoshop:
Here's some other highlights from the evening:
Craters Walter & Lexell:
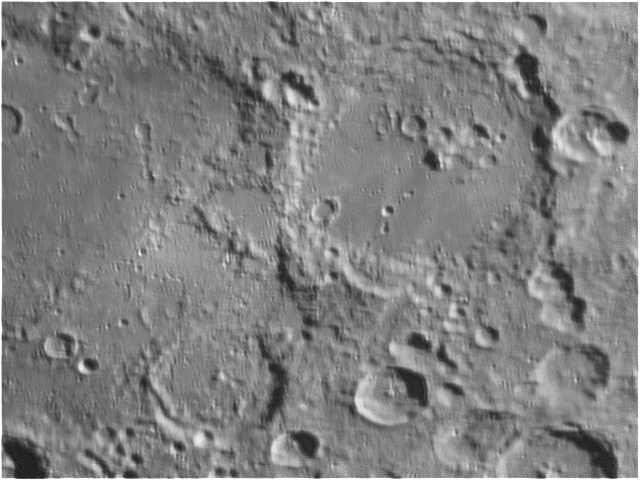
Craters Stöfler & Faraday:

Craters Saussure, Orontius, Huggins, Nasiredden, & Miller:
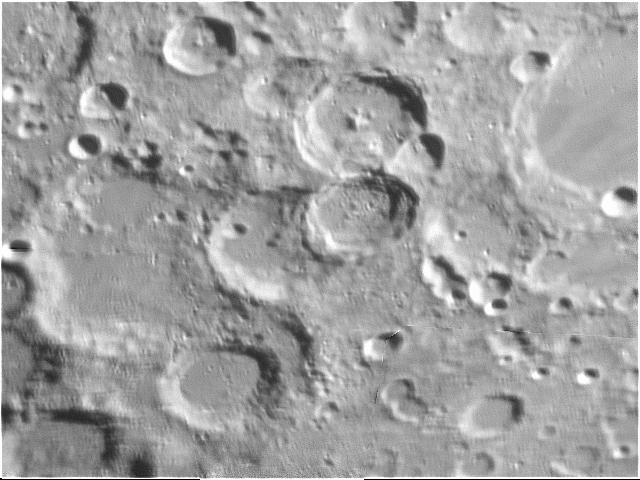
Rupus Recta:
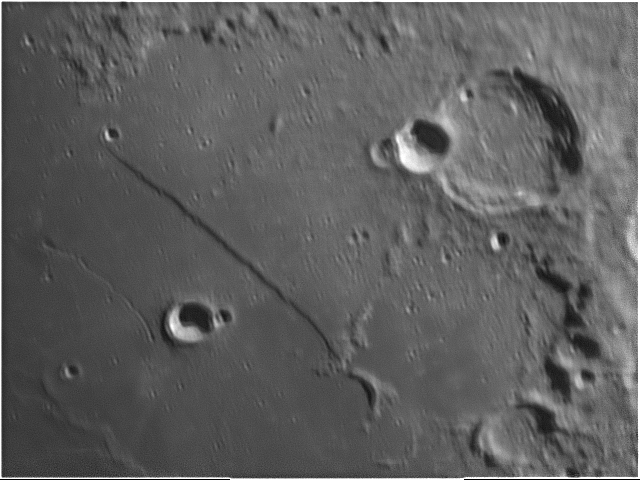
Craters Purbach & Thebit:
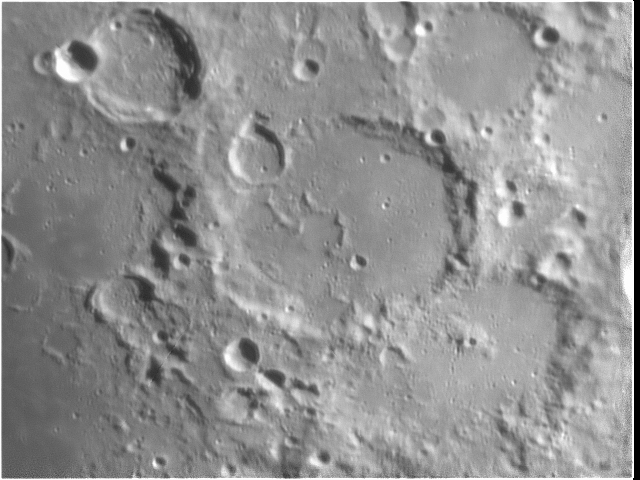
Craters Ptolemaeus & Herschel:
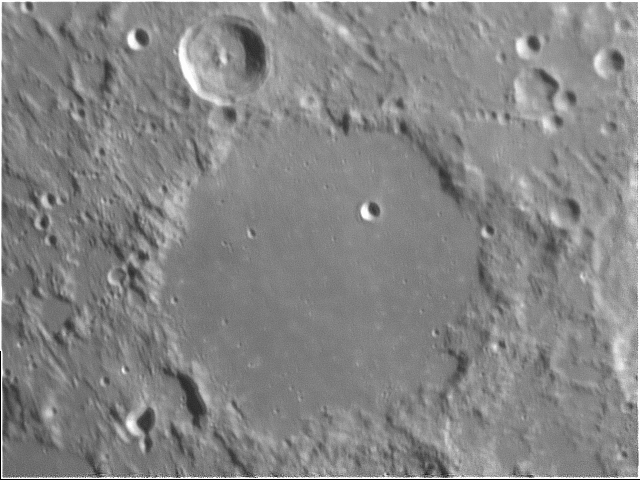
Craters Pitatus, Guaricus, Wurzelbauer, & Hesiodus:
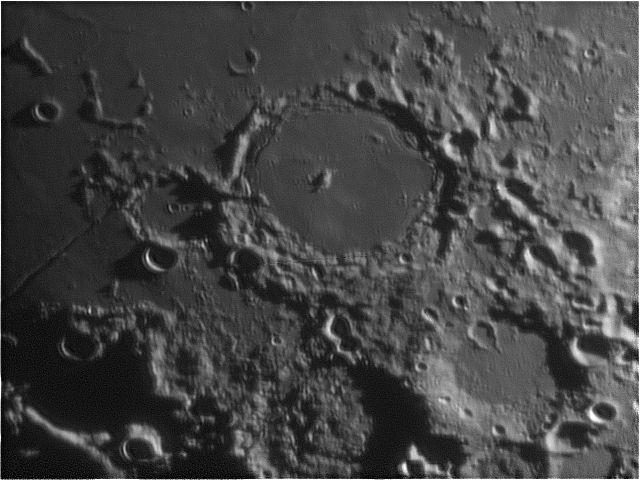
Craters Fra Mauro, Bonpland, & Parry:

Craters Arzachel, Alpetragius, & Thebit:

Wednesday, May 23, 2007
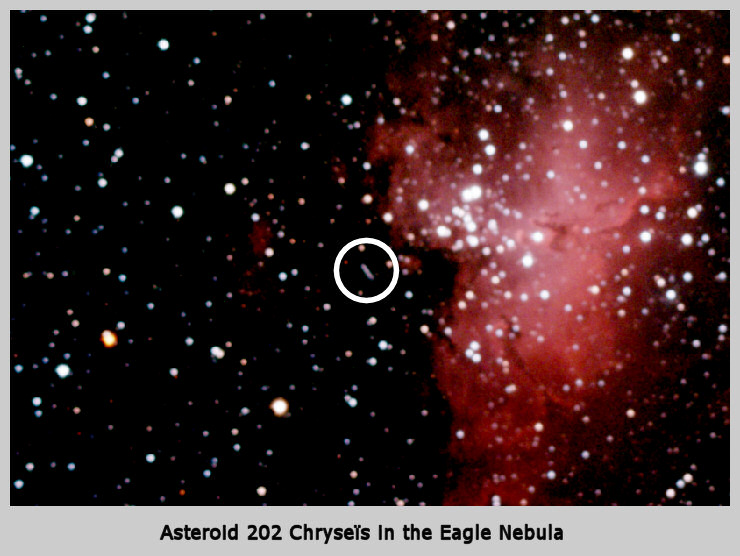
Caught an asteroid in M16
Thanks to Mike Broussard over on the Cloudy Nights board for pointing out the passage of Asteroid 202 Chryseïs through M16 on Sunday morning. Seems we were both imaging the same thing at the same time. His image turned out a lot, lot better. I intentionally overexposed the close-up view below to highlight the asteroid. I was wondering what that little streak was! Thanks Mike!

Tuesday, May 22, 2007
M13 - the Hercules Cluster
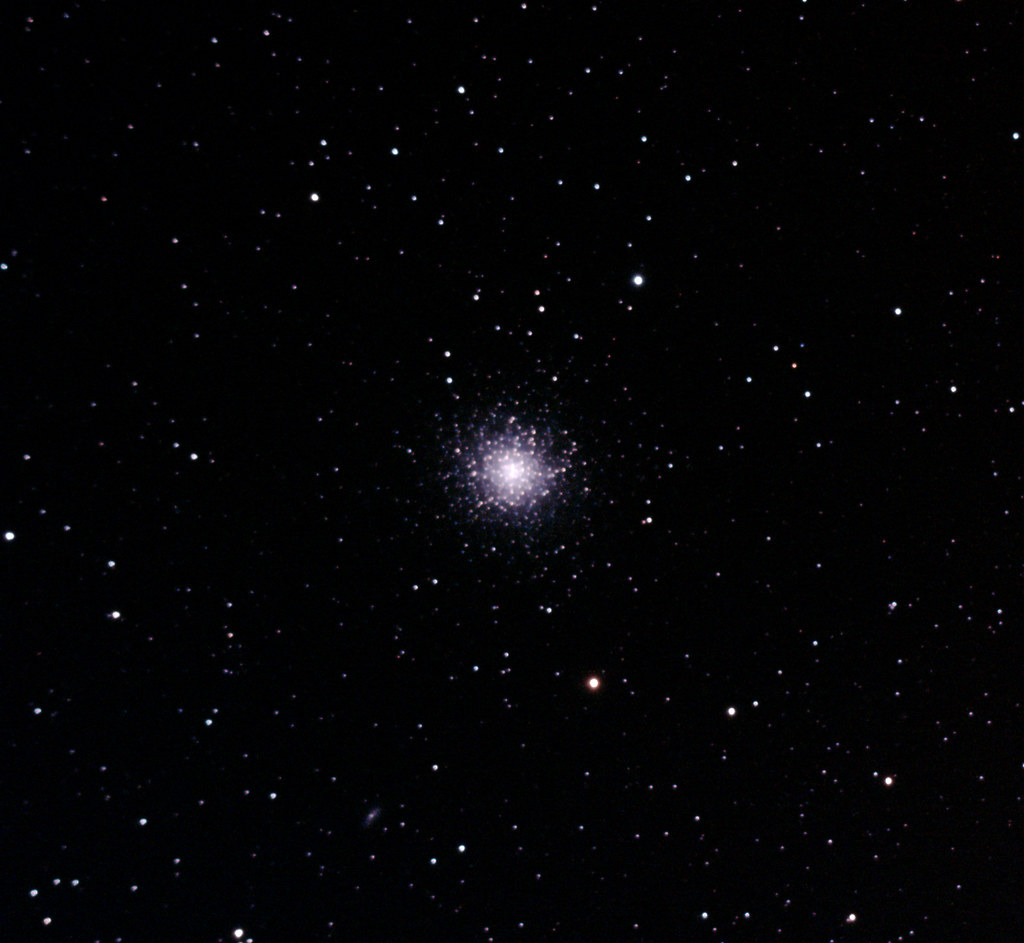
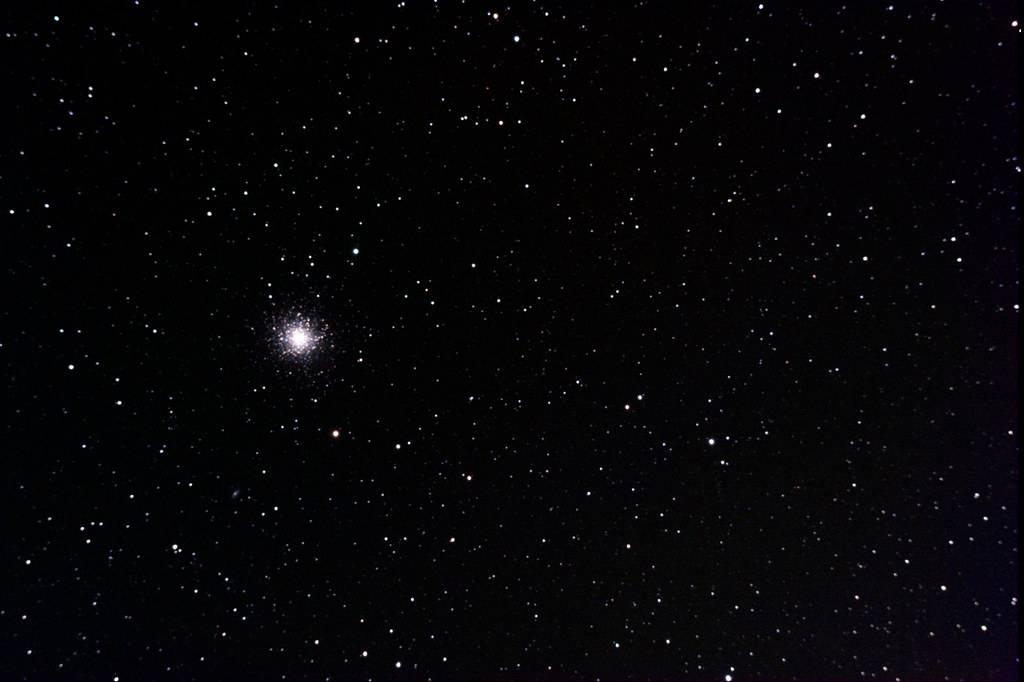
This is another one from last Saturday night. The Hercules Cluster, located in the constellation Hercules of course, lies about 25,000 light years away and contains hundreds of thousands of stars. The image scale is obviously way too small for my William Optics Zenithstar 80FD at 444mm focal length (with the flattener/reducer).
Below is a close-up crop of the full-frame image. I didn't get a lot of detail but I think it's OK for my first try:

Here's the full-frame version. You can see how small M13 is in this image.

Below is a close-up crop of the full-frame image. I didn't get a lot of detail but I think it's OK for my first try:
Here's the full-frame version. You can see how small M13 is in this image.
Monday, May 21, 2007
M16 - the Eagle Nebula
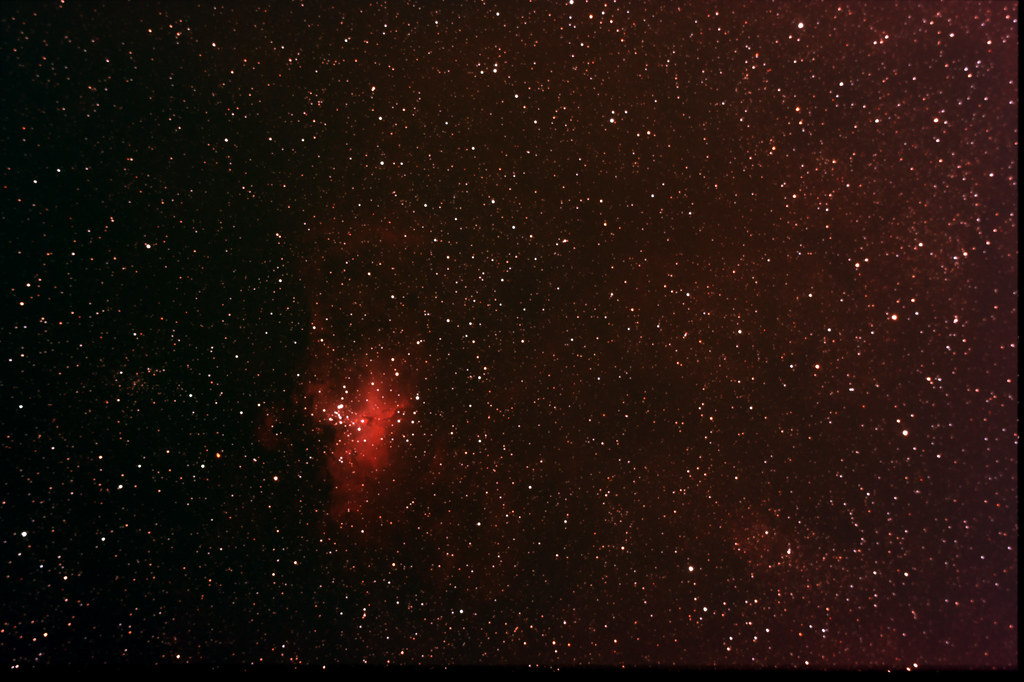
Last Saturday night (actually early Sunday morning) I waited for the Milky Way to rise to image some of the great objects located there. I was really trying for M20 (Trifid Nebula) and M8 (Lagoon Nebula) in the same frame, but I just couldn't find them after taking several test shots. So, I moved over to M16 and managed to find it quickly and get a guide star located. I was almost able to fit M17 (Omega Nebula) in the same frame, but that put both objects close to the edges of the frame. By this time it was nearly 2:30AM and I wanted to get this sequence started. Using ImagesPlus I set up a sequence of 100 exposures at 90 seconds each with an ISO of 800. By 5:30AM I was done and ready to tear down my equipment as dawn approached.
About 20 dark frames were acquired earlier in the evening and another 10 were taken as I was tearing everything down. The next day I used the t-shirt method to acquire my flat frames. Some older bias frames were use to round out my calibration sets for ImagesPlus.
The image below is only about 1/3 the total area of the full frame size. The Eagle Nebula is pretty small for my imaging scale when using the William Optics Zenithstar 80FD. With the flattener in place I am at about 444mm focal length. Eventually I will try this with my C8 and the 0.63 reducer. As I do more imaging I am finding what focal lengths I really need. Now I realize that something around 800mm would be a good complement to my collection. Currently I have my eye on the Vixen R200SS. Lots of saving to do for that one!

EDIT: I did some quick processing of the full image and posted it here just to give you an idea of the object size as compared to the camera's sensor size:

About 20 dark frames were acquired earlier in the evening and another 10 were taken as I was tearing everything down. The next day I used the t-shirt method to acquire my flat frames. Some older bias frames were use to round out my calibration sets for ImagesPlus.
The image below is only about 1/3 the total area of the full frame size. The Eagle Nebula is pretty small for my imaging scale when using the William Optics Zenithstar 80FD. With the flattener in place I am at about 444mm focal length. Eventually I will try this with my C8 and the 0.63 reducer. As I do more imaging I am finding what focal lengths I really need. Now I realize that something around 800mm would be a good complement to my collection. Currently I have my eye on the Vixen R200SS. Lots of saving to do for that one!
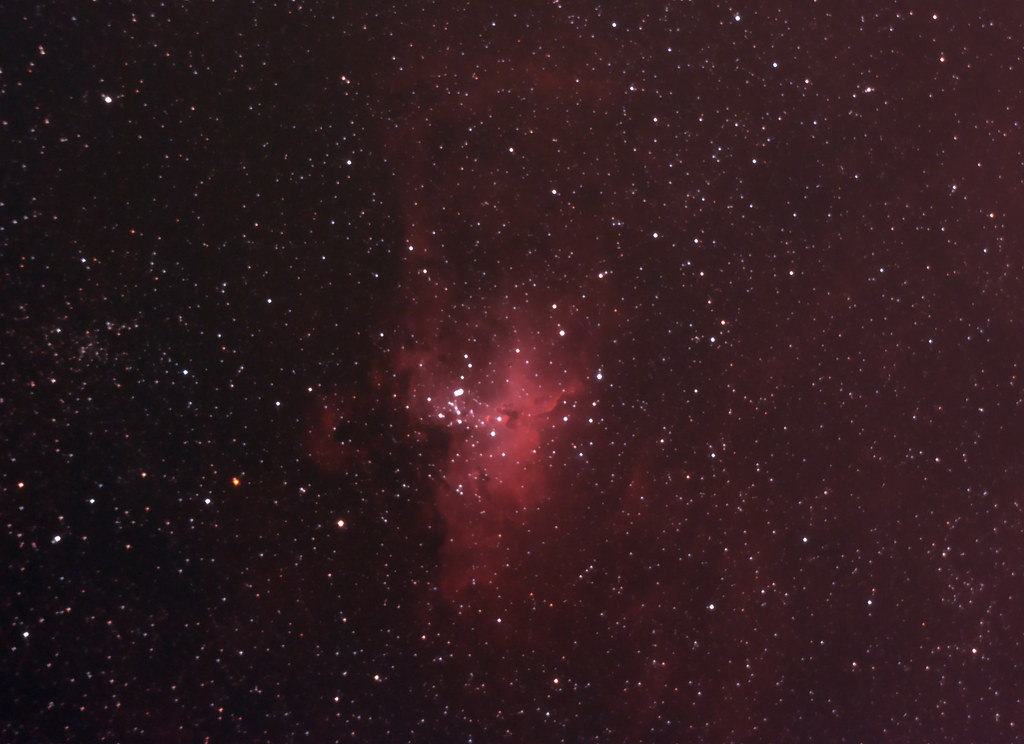
EDIT: I did some quick processing of the full image and posted it here just to give you an idea of the object size as compared to the camera's sensor size:
Sunday, May 20, 2007
My first lunar mosaic with the DMK
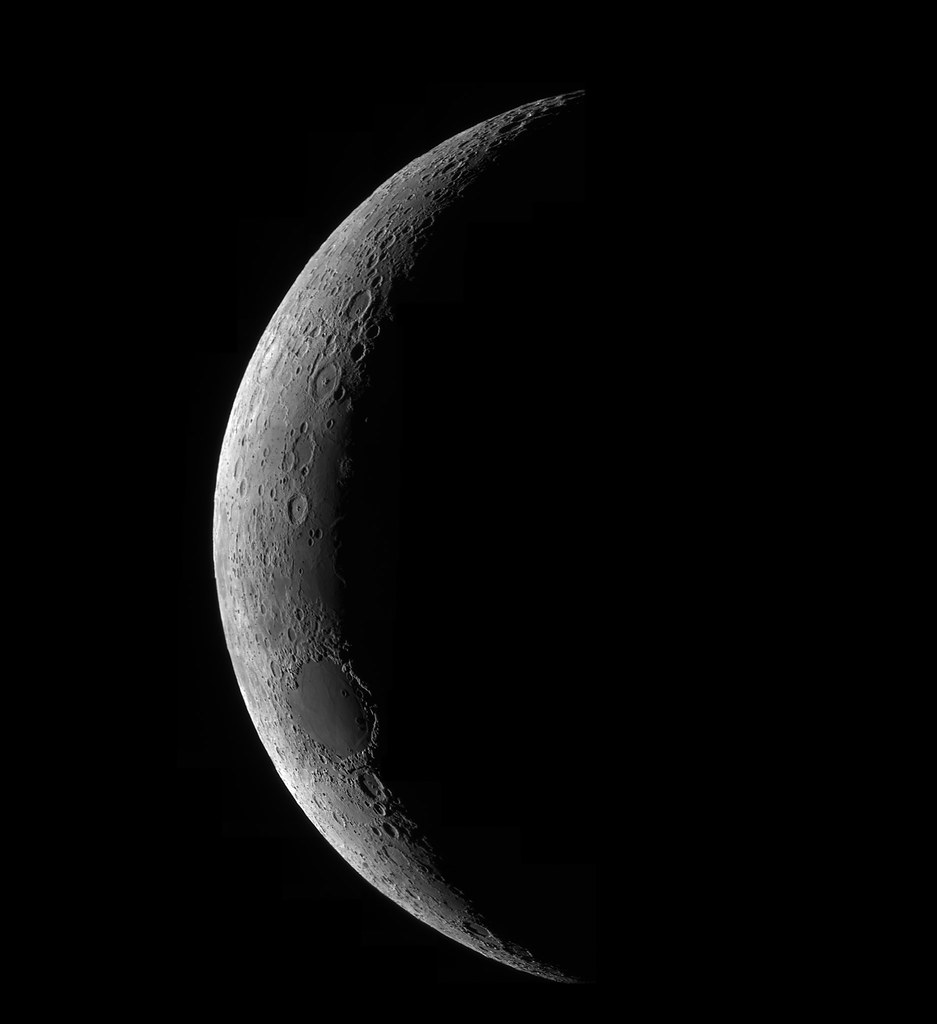
Last night I took about 22 AVI files of the moon, which was only 3.6 days old at the time and a very pretty crescent sitting right next to Venus. Each AVI was separately processed in Registax and saved as a TIFF file. Then the files were opened in Photoshop and manually pasted into a large new image. Registax will usually leave a little border on the image or you will be able to see the overlapping edges of many individual frames. What seemed to work best for me was the following:
1. In Photoshop, click Select > All, or CTRL+A
2. Click Select > Modify > Border, and specify a border of about 10 pixels
3. Click Select > Inverse to select everything inside the border.
4. It also helps to specify a feathered border of about 5 pixels. Click Select > Feather and enter the pixel value.
Do the above for every image that makes up the mosaic. Photoshop will try to fit them together as you move each image with the mouse. Usually it gets it right every time. I only had one image out of 22 that required me to manually adjust the image to get it to line up properly.
It's a good thing I was doing this with a young Moon. I couldn't imaging having to do this with a larger area. Just these 22 images took a long time to process and piece together. But I am pretty happy with the result and I am really loving the DMK camera. Below is the result of all the work:

1. In Photoshop, click Select > All, or CTRL+A
2. Click Select > Modify > Border, and specify a border of about 10 pixels
3. Click Select > Inverse to select everything inside the border.
4. It also helps to specify a feathered border of about 5 pixels. Click Select > Feather and enter the pixel value.
Do the above for every image that makes up the mosaic. Photoshop will try to fit them together as you move each image with the mouse. Usually it gets it right every time. I only had one image out of 22 that required me to manually adjust the image to get it to line up properly.
It's a good thing I was doing this with a young Moon. I couldn't imaging having to do this with a larger area. Just these 22 images took a long time to process and piece together. But I am pretty happy with the result and I am really loving the DMK camera. Below is the result of all the work:
Saturday, May 19, 2007
My first attempt at Saturn with the DMK

I shouldn't call this a real attempt, more of just a quickie try before I packed up early last night. Had to call it a night pretty early because I needed to get up early this morning. Saturn was moving all over the place due to less-than-average seeing conditions, but I figured what the heck. With the 2X barlow in place I was now at over 4000mm focal length with the C8 at f/20, so any little movements due to the atmosphere were magnified even further.
The DMK is great for this kind of work and I am starting to catch the "planetary imaging bug." The IC Capture software is really easy to use and the controls are intuitive, making good results repeatable. One of these days I will get a color filter wheel so I can do RBG imaging. That'll be a future upgrade once I save up the cash. For now there's plenty of fun to have in monochrome, and plenty more to learn.

Tuesday, May 15, 2007
Getting set up for remote operation
The weather hasn't cooperated here on the weekends for a while so I have been busy with yardwork and some indoor projects. A few weeks ago my wife's 2-year old laptop started making some noise whenever the fan was running. This was a sign that the fan was about to go. On top of that, the LCD was beginning to fade out. This seemed like a good time for my wife to upgrade. I got the idea to try repairing the fan and get a little more use out of the little laptop. Something I have wanted to do is control my telescope and cameras via remote control. Currently I have been leaving my Dell XPS M1210 outside while it snaps aways a series of images. That always makes me a little nervous to leave my main computer sitting outside unattended. As soon as my wife's new laptop came in, a HUGE Dell Inspiron E1705, I proceeded to tear apart the old laptop and fix the fan. That is, of course, after copying gigs and gigs of files to the new laptop in case the old one didn't survive the surgery. I managed to locate a brand new fan on Ebay and it will be here in a few days. Meanwhile, this is what the laptop looks like now:

All that work just to get to the cooling fan! Pretty much everything in the laptop had to be removed. Fortunately the service manual was easily available on the Dell support site.
When I started looking into remote PC operation, I first tried Remote Desktop Connection, which is built-in to Windows XP. I quickly ran into one stupid limitation with Windows XP Home edition - XP Home cannot be controlled remotely by another PC. BUT, XP Home can control another PC remotely without a problem. This was a problem because the old laptop is running XP Home and my newer XPS is running XP Pro. After looking around I came across TightVNC. This free program works on Windows and Unix and is so easy to set up and use. In a couple of minutes I had my XPS controlling the old laptop (of course this was all before I tore it apart!). A nice thing I like about TightVNC is that the PC being controlled does not black out it's screen like Remote Desktop Connection does. This means that if I go outside to check on my telescope, I can quickly make changes on the local laptop without having to run back inside and disable control with RDC. I will still have to go out and get everything focused manually, but after that I should be able to do most everything from the comfort of my sofa. Eventually I will finish my electronic focuser project and make that PC-controlled. One other important piece that makes this all possible is the EQDIR interface and EQMOD software for my EQ6 mount. This eliminates the need for the hand controller and puts the functionality into PC-based software.
But, all that will have to wait because this weekend looks clear and the moon is nearly new. Time to finally get back out and do some imaging!

All that work just to get to the cooling fan! Pretty much everything in the laptop had to be removed. Fortunately the service manual was easily available on the Dell support site.
When I started looking into remote PC operation, I first tried Remote Desktop Connection, which is built-in to Windows XP. I quickly ran into one stupid limitation with Windows XP Home edition - XP Home cannot be controlled remotely by another PC. BUT, XP Home can control another PC remotely without a problem. This was a problem because the old laptop is running XP Home and my newer XPS is running XP Pro. After looking around I came across TightVNC. This free program works on Windows and Unix and is so easy to set up and use. In a couple of minutes I had my XPS controlling the old laptop (of course this was all before I tore it apart!). A nice thing I like about TightVNC is that the PC being controlled does not black out it's screen like Remote Desktop Connection does. This means that if I go outside to check on my telescope, I can quickly make changes on the local laptop without having to run back inside and disable control with RDC. I will still have to go out and get everything focused manually, but after that I should be able to do most everything from the comfort of my sofa. Eventually I will finish my electronic focuser project and make that PC-controlled. One other important piece that makes this all possible is the EQDIR interface and EQMOD software for my EQ6 mount. This eliminates the need for the hand controller and puts the functionality into PC-based software.
But, all that will have to wait because this weekend looks clear and the moon is nearly new. Time to finally get back out and do some imaging!
Subscribe to:
Posts (Atom)