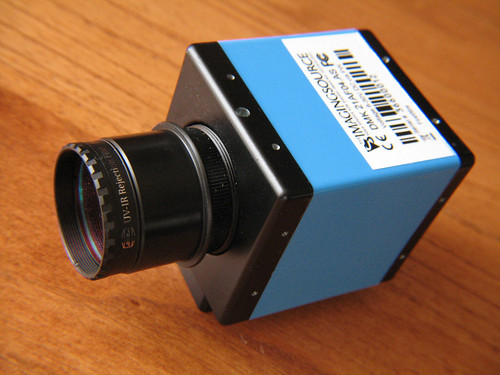
 The weather continues to be uncooperative for imaging and doesn't appear to show any sign of giving me a break for the duration of the extended forecast. When the skies cloud over, astronomers usually focus on DIY projects, learning & research, catching up on sleep, drinking, or any combination thereof. I decided on a little DIY project to kick off the new year, along with some drinking thrown in there of course. I prefer single-malt Scotch, or anything with vodka in it. And an aged tawny port makes a nice nightcap too. What were we talking about? Oh yeah - my DIY project. This project requires some background information to explain why the heck I would build such a thing. It all started not long after I got my DMK21AF04 firewire camera from The Imaging Source. They make high frame-rate cameras for scientific, medical, and industrial applications. Fortunately for amateur astronomers like us, the cameras are also sensitive in low-light conditions. The high frame rate lets us capture better images of the planets too. The DMK has two uses for me: autoguiding and planetary imaging. I started off with autoguiding and discovered a problem - a bright stuck pixel, or possibly group of pixels, was really messing up my guiding sometimes since the software would try tracking the "false star" caused by the stuck pixel. The great folks at The Imaging Source were kind enough to arrange an exchange. About the same time, I had heard about a new version of the camera (with an "AS" suffix) was being developed for astronomy use. The new version would allow exposures up to 60 minutes. The original version I had would only go up to 30 seconds. Luckily enough, they replaced my DMK with the new "AS" version. This meant that I now had not only a great planetary imager and autoguiding camera, but also a long-exposure CCD camera for deep-space stuff too. All in one package!

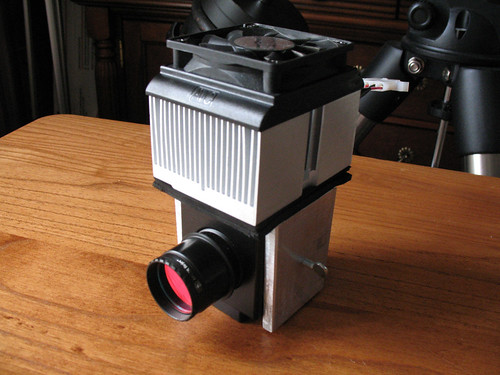
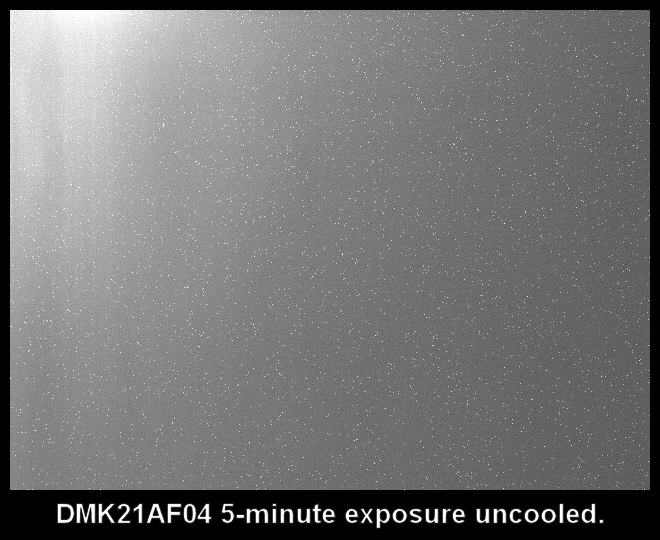
Most of the higher-end CCD cameras are cooled, so I thought: why not give it a try on this one? I had most everything I needed already: some thermoelectric cooling modules (also called Peltier devices) and a CPU cooling fan. Now I just needed a "cold plate" - something to transfer heat away from what we want to be cold. I bought some aluminum square tube that had inside dimensions the same as the camera. It wasn't quite that easy and I ended up cutting off one side of the square to make things easier to file down to size. The thermoelectric cooler (from Melcor) was bonded to the CPU cooler heat sink, and then to the cold plate, using thermal epoxy. Some rubber sheet material from Hobby Lobby was placed between the heat sink and cold plate for insulation. The only remaining issue was the DC power for everything. The fan on the CPU cooler needed 12V and the thermoelectric cooler needed 5V. That turned out to be an easy one - I picked up a high-capacity computer power supply that was less than $20 after a big rebate. The final touch was some Molex connectors and I was ready for testing. I decided to use 5-minute exposures as a test. First, I let the DMK take about an hour's worth of 5-minute dark frames without the cooling module turned on. Then, I turned on the cooling module and let it take another hour of exposures. The results seem pretty good and I am anxious to get out and try this under some real imaging, if the weather ever clears out. Below is a comparison between the last uncooled exposure taken and the last cooled exposure taken. Noise is reduced and we are left with hot pixels and some sort of glow in the corner that I haven't figured out yet.


This is five years late, but the bright glow in the corner is either due to stray light entering your camera aperture during your dark exposure, or more likely, noise due to the CCD readout electronics working under the CCD. I work with CCD cameras all the time (astrophysicist) and we see this type of pattern in all of our cameras.
ReplyDeleteThis is five years late, but the bright glow in the corner is either due to stray light entering your camera aperture during your dark exposure, or more likely, noise due to the CCD readout electronics working under the CCD. I work with CCD cameras all the time (astrophysicist) and we see this type of pattern in all of our cameras.
ReplyDelete