Sunday, May 27, 2007

More lunar imaging with the DMK camera

Last Friday night, under good transparent skies, I tried my hand once again at lunar imaging with the DMK21AF04. This little camera continues to impress me. It makes it so easy to get great results. Of course a properly collimated telescope and good focus helps too. I think I got the collimation spot-on but focus is always tricky.
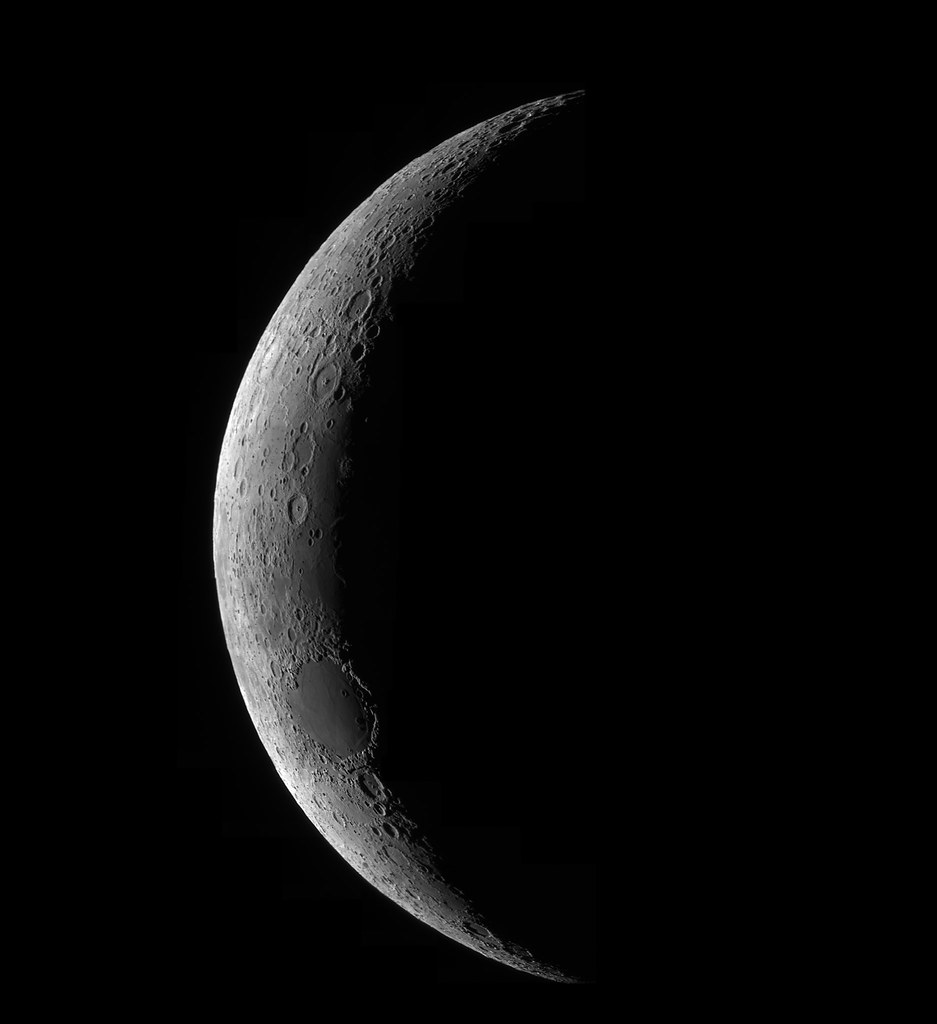
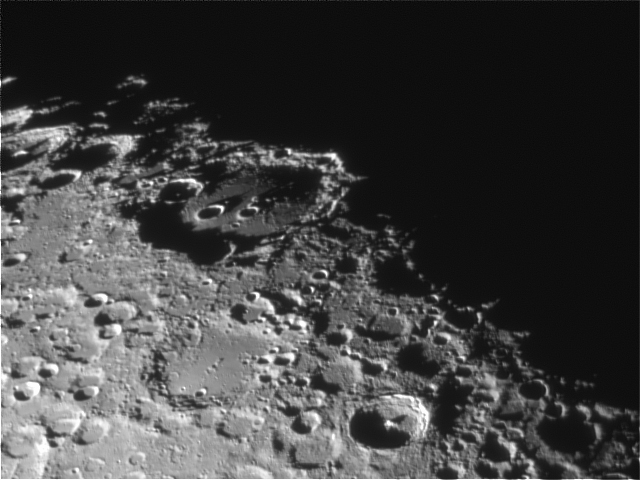
I started the night with the slightly-more-than-half-full moon directly overhead, which is a prime spot for getting good images. The Tycho & Clavius area was my first target. Below is my first image, recorded at the Celestron C8's native focal length of 2032mm at f/10:

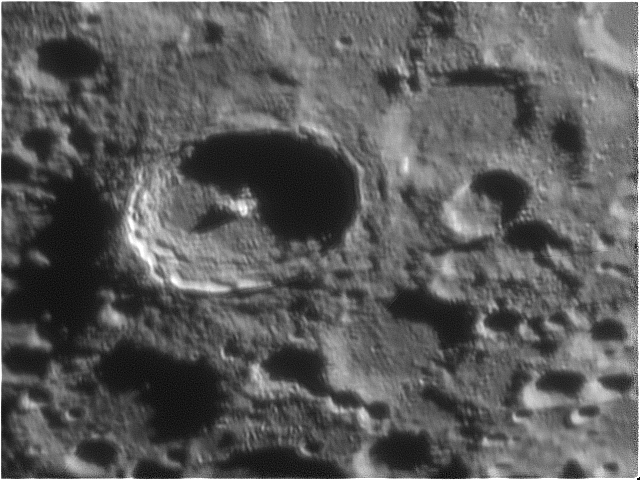
To get closer in, you need to increase focal length. A barlow is the most common method of doing this and they come in various power ratings and quality levels. My barlow is a 2" Siebert telecentric model with a 2X power rating. This doubles my focal length and allows some really close-up viewing of the moon. The power can be further increased by adding an extension between the back of the barlow and the camera. Here's a close up of Clavius using this method with a 2" extension:

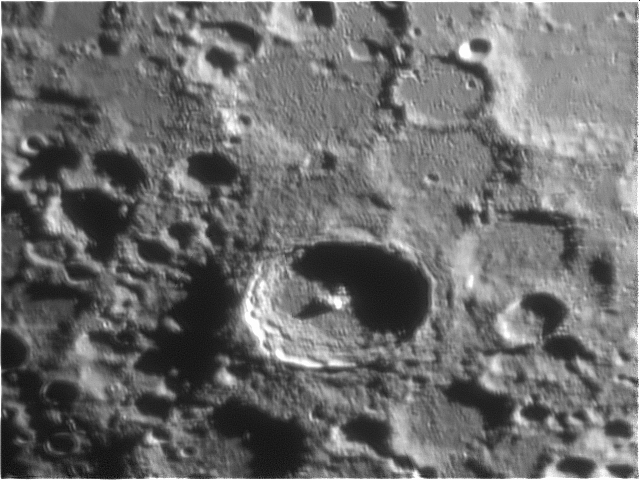
As you increase focal length, the image becomes darker and movement from atmospheric distortion gets magnified even more. It gets really difficult to capture a good image at this focal length. Below is another extreme close up, this is Tycho:

Without the extension the same area looks like this:

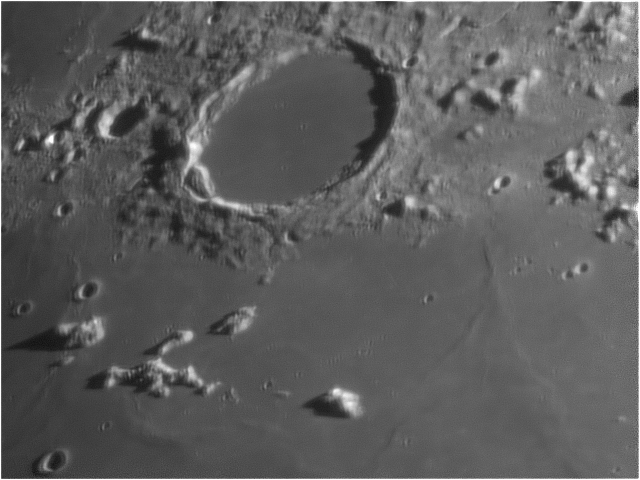
The same effect can be seen here on the crater Plato. Here's an image with the 2X barlow and 2" extension:

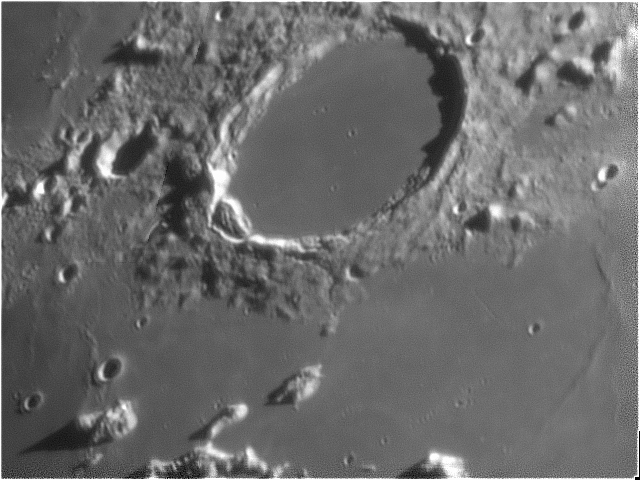
Removing the extension increases the field of view as seen below:

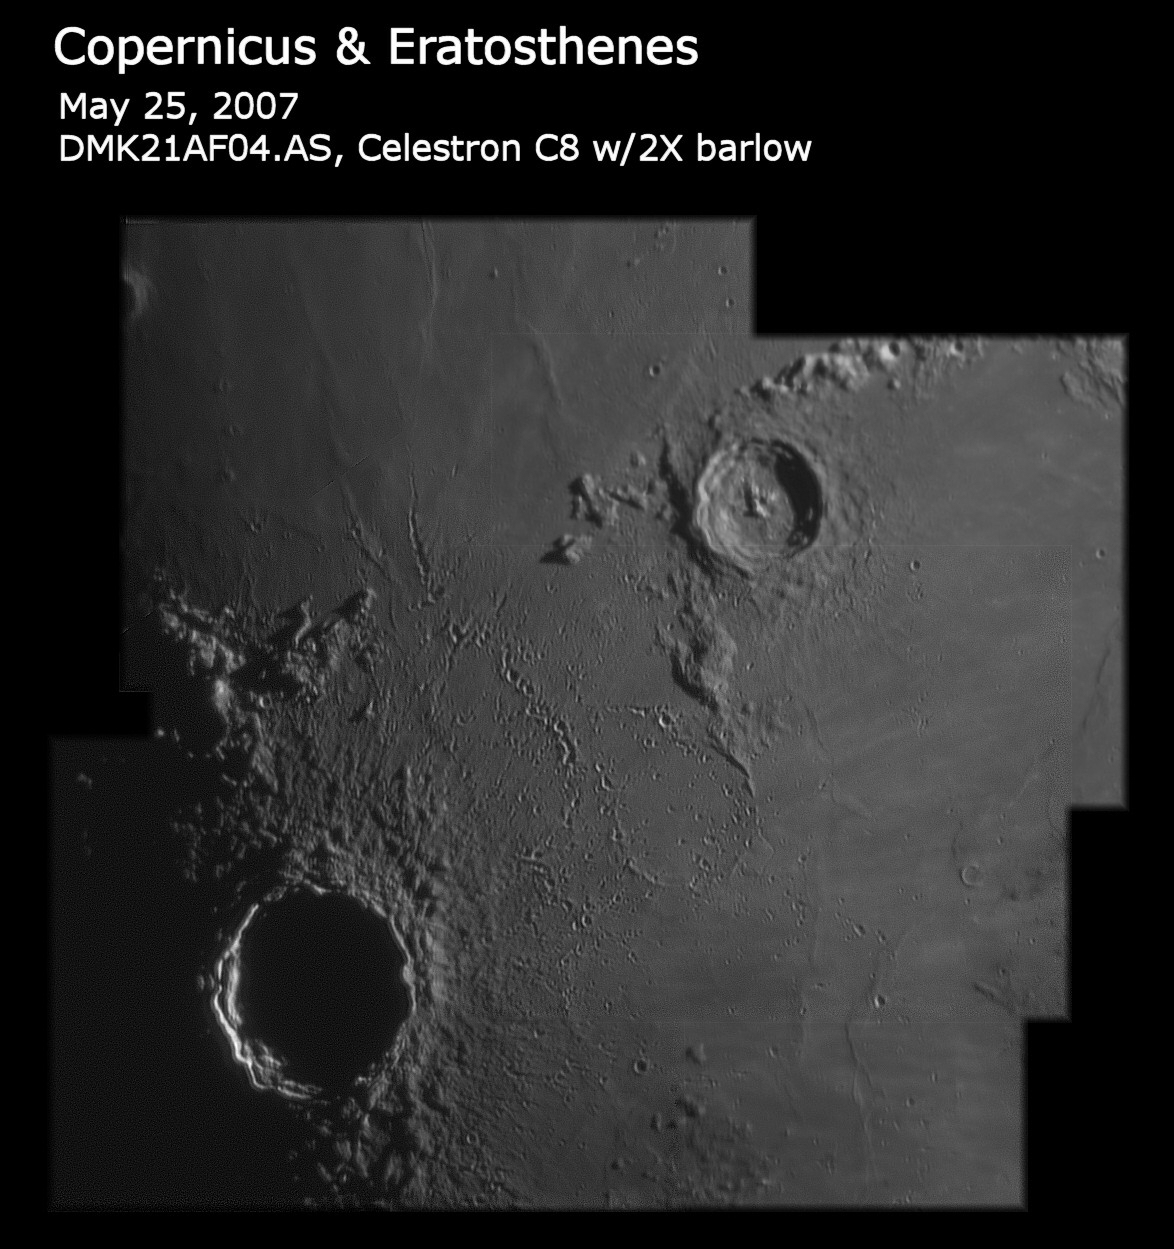
Next, I recorded several AVI's around the crater Copernicus and created a mosaic in Photoshop:

Here's some other highlights from the evening:
Craters Walter & Lexell:

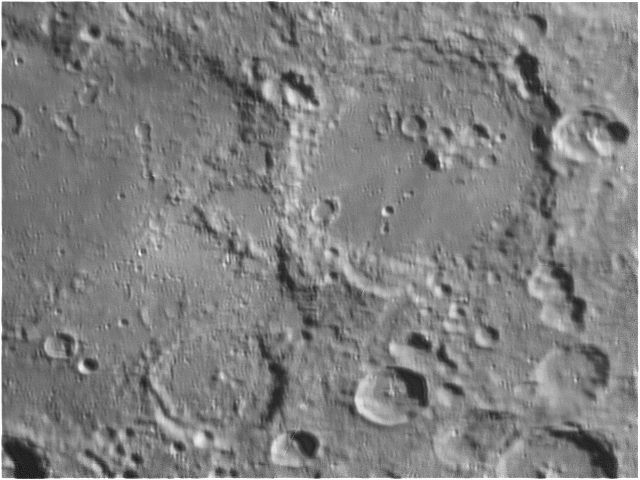
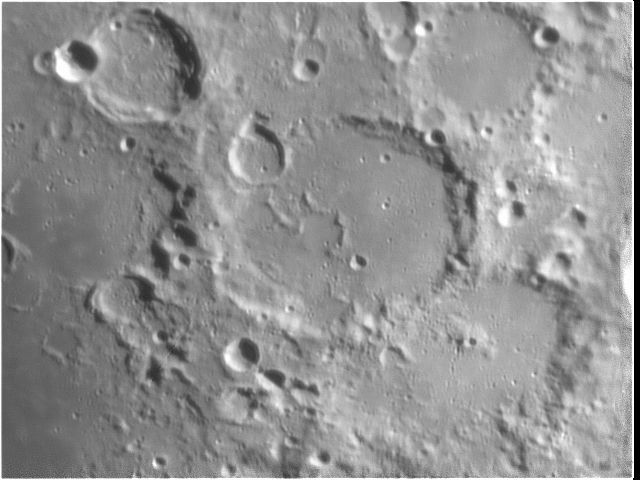
Craters Stöfler & Faraday:

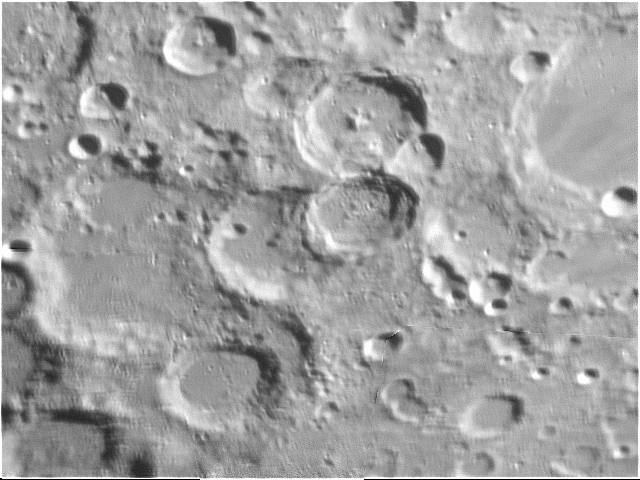
Craters Saussure, Orontius, Huggins, Nasiredden, & Miller:
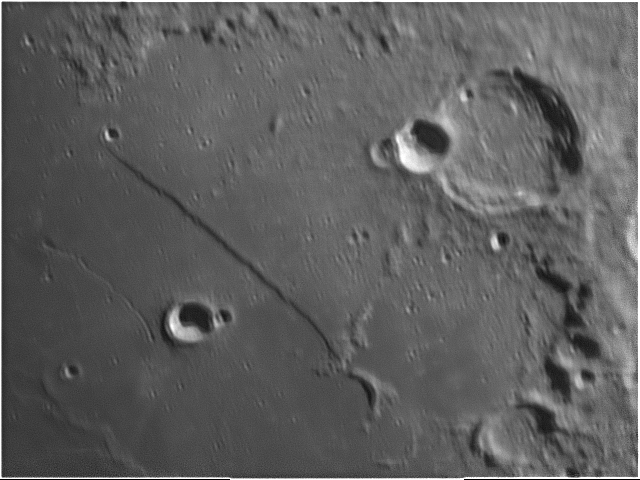
Rupus Recta:

Craters Purbach & Thebit:

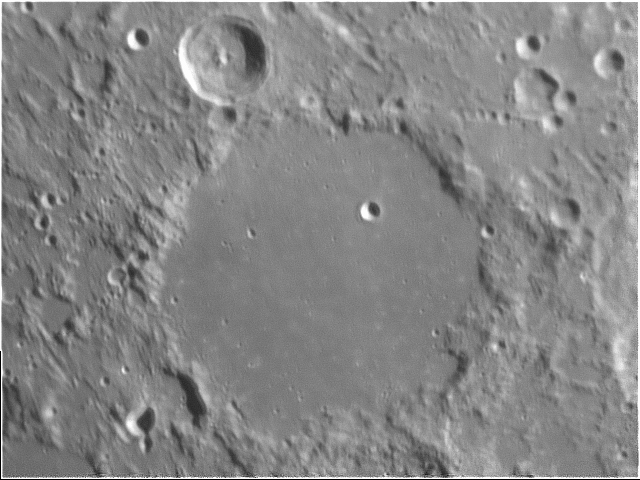
Craters Ptolemaeus & Herschel:

Craters Pitatus, Guaricus, Wurzelbauer, & Hesiodus:

Craters Fra Mauro, Bonpland, & Parry:

Craters Arzachel, Alpetragius, & Thebit:

Wednesday, May 23, 2007

Caught an asteroid in M16

Thanks to Mike Broussard over on the Cloudy Nights board for pointing out the passage of Asteroid 202 Chryseïs through M16 on Sunday morning. Seems we were both imaging the same thing at the same time. His image turned out a lot, lot better. I intentionally overexposed the close-up view below to highlight the asteroid. I was wondering what that little streak was! Thanks Mike!


Tuesday, May 22, 2007

M13 - the Hercules Cluster

This is another one from last Saturday night. The Hercules Cluster, located in the constellation Hercules of course, lies about 25,000 light years away and contains hundreds of thousands of stars. The image scale is obviously way too small for my William Optics Zenithstar 80FD at 444mm focal length (with the flattener/reducer).
Below is a close-up crop of the full-frame image. I didn't get a lot of detail but I think it's OK for my first try:


Here's the full-frame version. You can see how small M13 is in this image.


Monday, May 21, 2007

M16 - the Eagle Nebula

Last Saturday night (actually early Sunday morning) I waited for the Milky Way to rise to image some of the great objects located there. I was really trying for M20 (Trifid Nebula) and M8 (Lagoon Nebula) in the same frame, but I just couldn't find them after taking several test shots. So, I moved over to M16 and managed to find it quickly and get a guide star located. I was almost able to fit M17 (Omega Nebula) in the same frame, but that put both objects close to the edges of the frame. By this time it was nearly 2:30AM and I wanted to get this sequence started. Using ImagesPlus I set up a sequence of 100 exposures at 90 seconds each with an ISO of 800. By 5:30AM I was done and ready to tear down my equipment as dawn approached.
About 20 dark frames were acquired earlier in the evening and another 10 were taken as I was tearing everything down. The next day I used the t-shirt method to acquire my flat frames. Some older bias frames were use to round out my calibration sets for ImagesPlus.
The image below is only about 1/3 the total area of the full frame size. The Eagle Nebula is pretty small for my imaging scale when using the William Optics Zenithstar 80FD. With the flattener in place I am at about 444mm focal length. Eventually I will try this with my C8 and the 0.63 reducer. As I do more imaging I am finding what focal lengths I really need. Now I realize that something around 800mm would be a good complement to my collection. Currently I have my eye on the Vixen R200SS. Lots of saving to do for that one!


EDIT: I did some quick processing of the full image and posted it here just to give you an idea of the object size as compared to the camera's sensor size:


Sunday, May 20, 2007

My first lunar mosaic with the DMK

Last night I took about 22 AVI files of the moon, which was only 3.6 days old at the time and a very pretty crescent sitting right next to Venus. Each AVI was separately processed in Registax and saved as a TIFF file. Then the files were opened in Photoshop and manually pasted into a large new image. Registax will usually leave a little border on the image or you will be able to see the overlapping edges of many individual frames. What seemed to work best for me was the following:


1. In Photoshop, click Select > All, or CTRL+A
2. Click Select > Modify > Border, and specify a border of about 10 pixels
3. Click Select > Inverse to select everything inside the border.
4. It also helps to specify a feathered border of about 5 pixels. Click Select > Feather and enter the pixel value.


Do the above for every image that makes up the mosaic. Photoshop will try to fit them together as you move each image with the mouse. Usually it gets it right every time. I only had one image out of 22 that required me to manually adjust the image to get it to line up properly.
It's a good thing I was doing this with a young Moon. I couldn't imaging having to do this with a larger area. Just these 22 images took a long time to process and piece together. But I am pretty happy with the result and I am really loving the DMK camera. Below is the result of all the work:


Saturday, May 19, 2007

My first attempt at Saturn with the DMK


I shouldn't call this a real attempt, more of just a quickie try before I packed up early last night. Had to call it a night pretty early because I needed to get up early this morning. Saturn was moving all over the place due to less-than-average seeing conditions, but I figured what the heck. With the 2X barlow in place I was now at over 4000mm focal length with the C8 at f/20, so any little movements due to the atmosphere were magnified even further.
The DMK is great for this kind of work and I am starting to catch the "planetary imaging bug." The IC Capture software is really easy to use and the controls are intuitive, making good results repeatable. One of these days I will get a color filter wheel so I can do RBG imaging. That'll be a future upgrade once I save up the cash. For now there's plenty of fun to have in monochrome, and plenty more to learn.


Tuesday, May 15, 2007

Getting set up for remote operation

The weather hasn't cooperated here on the weekends for a while so I have been busy with yardwork and some indoor projects. A few weeks ago my wife's 2-year old laptop started making some noise whenever the fan was running. This was a sign that the fan was about to go. On top of that, the LCD was beginning to fade out. This seemed like a good time for my wife to upgrade. I got the idea to try repairing the fan and get a little more use out of the little laptop. Something I have wanted to do is control my telescope and cameras via remote control. Currently I have been leaving my Dell XPS M1210 outside while it snaps aways a series of images. That always makes me a little nervous to leave my main computer sitting outside unattended. As soon as my wife's new laptop came in, a HUGE Dell Inspiron E1705, I proceeded to tear apart the old laptop and fix the fan. That is, of course, after copying gigs and gigs of files to the new laptop in case the old one didn't survive the surgery. I managed to locate a brand new fan on Ebay and it will be here in a few days. Meanwhile, this is what the laptop looks like now:


All that work just to get to the cooling fan! Pretty much everything in the laptop had to be removed. Fortunately the service manual was easily available on the Dell support site.
When I started looking into remote PC operation, I first tried Remote Desktop Connection, which is built-in to Windows XP. I quickly ran into one stupid limitation with Windows XP Home edition - XP Home cannot be controlled remotely by another PC. BUT, XP Home can control another PC remotely without a problem. This was a problem because the old laptop is running XP Home and my newer XPS is running XP Pro. After looking around I came across TightVNC. This free program works on Windows and Unix and is so easy to set up and use. In a couple of minutes I had my XPS controlling the old laptop (of course this was all before I tore it apart!). A nice thing I like about TightVNC is that the PC being controlled does not black out it's screen like Remote Desktop Connection does. This means that if I go outside to check on my telescope, I can quickly make changes on the local laptop without having to run back inside and disable control with RDC. I will still have to go out and get everything focused manually, but after that I should be able to do most everything from the comfort of my sofa. Eventually I will finish my electronic focuser project and make that PC-controlled. One other important piece that makes this all possible is the EQDIR interface and EQMOD software for my EQ6 mount. This eliminates the need for the hand controller and puts the functionality into PC-based software.
But, all that will have to wait because this weekend looks clear and the moon is nearly new. Time to finally get back out and do some imaging!